Showing posts with label 3-D items. Show all posts

Friday, August 28, 2015

Stampin' Addicts 2015 Holiday Catalog Fall Blog Hop

Hello hoppers!  Most of you just came from Tanya's Blog.  Wasn't that a cute stamp set?  So much fun and so many uses.  If you came here directly, don't worry, just follow the links on the hop and it will loop you all the way around back to here.  We love to hear from you about our hops and projects.  You can leave a comment on any of the stops or leave a comment on the discussion thread at Stampin' Addicts.

I am featuring the Sweet Hauntings Stamp Set (#139705) from page 47 of the 2015 Holiday Catalog.  I have had so much fun showing this stamp set on my blog last week and have 3 more projects just for this hop.  There are so many uses for this stamp set.  There are 3 images that fit the Note Tag Punch (#135860), 4 different potion bottles, and 2 sayings that tie everything together.  My family LOVES Halloween.  We enjoy having our friends (of ALL ages) over for a night of spooky food and fun.


First I have a great party invitation for you.  I stamped all of the potion bottles on the front of my card, then colored them in with various Stampin' Write Markers.  TIP:  I used my grid paper to line up all the stamps, then put them on one block so they will be straight when I stamp them.  Under the bottles is a piece of the bat print washi tape from the Happy Haunting Designer Washi Tape (#139608).  I stamped one of the sayings from the stamp set in Cucumber Crush on the bottom.  A few quick tid bits to decorate the upper corner, my party information on the inside and I am ready to invite my guests.

I love to have cute little treats for my kids to take to school.  This is the medium size treat bag from the Gift Bag Punch Board (#135862).  NOTE: The size of the bag refers to the size of the bottom of the bag.  You can make the bag as tall or as short as you like to fit your treats.  Again I stamped several of the bottles at once on the bag, then put another print from the Washi Tape around the bag.  I made a simple topper for the bag.  I folded a piece of Tangerine Tango cardstock in half and attached a Spider Web Doily (#139622) with a glue stick.  I wrapped the extra edges of the doily around the cardstock.  This is the other sentiment from the stamp set, stamped in Rich Razzleberry to match the bag.  The back of the topper is attached to the bag and I used a small bit of velcro to hold the front closed.  


For my party guests I have a treat basket.  I used my markers to color certain parts of the Note Tag shaped stamps.  They make cute tombstone images.  The center one was stamped again on cardstock and cut out to raise it up on dimensionals.  The basket was made with the Berry Basket Die (#137366) from the Annual Catalog.  I tied a piece of Rich Razzleberry Cotton Ribbon (#134564) around the top of the basket.  You can see a piece of Rich Razzleberry cardstock peaking through the slits near the bottom.  I took a 5-1/2" square piece of cardstock, scored it on all four sides at 1-1/4", folded on the score lines, made a few quick slits to shape it into an open box.  I punched a circle in the center of the insert to hold a cupcake.  
I know a picture would be great, but there was an "accident" with the cupcake.  You could of course fill the basket with a bag filled with candy or other treats.  

I hope you enjoyed my projects with the Sweet Haunting Stamp Set.  If you did, please leave me a message below before going to the next stop on the hop.  The next stop is Carmen with some Hall-O-Ween Treats.



My Demonstrator Website

Friday, August 21, 2015

Quick Haunting Favor Boxes

I wanted to show up a few more of the prints in the Happy Haunting Designer Series Paper.  What better way than with a quick project.


I made these boxes with the Gift Box Punch Board.  I used a 6x6 piece of cardstock to make a 1.75" box.  They are simply tied shut with a piece of ribbon.  I made the tags with the Sweet Haunting Stamp Set.  By using markers to color the stamp I was able to use just the decorative border on the stamp.  This let me write my own tombstone names on the tag.  Simple and fast for personalized classroom or party favors.

Thank you for joining me this week for a sneak peek at some Halloween themed products coming soon in the Holiday Catalog.

PRODUCTS USED:
Built for Free Using: My Stampin Blog


My Demonstrator Website

Wednesday, August 19, 2015

BOO Banner

I know it is only August, but I am on a major Halloween kick.  I can't wait for real fall weather to get here, go pick some pumpkins and put up my outdoor decorations.  I was looking at the Spider Web Doilies I have used the last two days and thought about how to use them on a banner.  I decided not to go with a long spelled out banner, but more of a door knob hanger.  This would go along great with the "You've Been Boo'd" neighbor treats.


Stampin' Up! reconfigured the Build-A-Banner Kit this year.  I really like the new shapes to the banner pieces and they have added some templates to sponge decorative edges on them.  Here is the scalloped edge banner with the dotted template.  I used a Sponge Dauber to apply the Rich Razleberry ink to the banner piece.  The "BOO" is done with the Layered Letters Stamp Set.  I used a Stampin' Write Marker to draw on the pumpkin stems before cutting out the piece with my scissors.  I attached the doily and "BOO" to the banner with some Multi-purpose Glue.

PRODUCTS USED:
Built for Free Using: My Stampin Blog


My Demonstrator Website

Tuesday, August 18, 2015

Candy Bar Halloween Treat

I have another project today with the Sweet Haunting Stamp Set.  Just like the title of the stamp set, this project is sweet.  One of the Note Tag Punch shaped stamps in the set says "DEATH BY CHOCOLATE", so of course we need a chocolate treat.  How about a full size Hershey bar?  I can think of lots of people who would want one of these everyday.


I first wrapped the chocolate bar with another piece (5-1/2" x 5-1/2") from the Happy Haunting Designer Series Paper.  The new Tear and Tape adhesive is wonderful for holding bent papers closed.  This is the other half of the Spider Web Doily from yesterday's project.  I then layered a 1/2" strip of Rich Razzleberry on the bottom and put a couple pieces behind the Tangerine Tango tag piece.  (Exciting New Product Coming--The black ink is a new Archival Black Ink Pad.  Stamps a true black color for those who have been getting a purple tint from our standard Basic Black Classic Ink Pad).  There is a long piece of Black Stitched Satin Ribbon that loops around the candy bar to pull it out of the sleeve.   


Here is the set of projects together.  I love how you can cut the Spider Web Doilies into two pieces to get even more projects and still have a good size impact on your project.  I forgot to mention you get 24 of those doilies in a pack for only $4.50.  What a deal for making a classroom full of treats.  Cut them in half and get two classes of treats for your kids.

PRODUCTS USED:
Built for Free Using: My Stampin Blog


My Demonstrator Website

Friday, June 26, 2015

Layered Letters--Last Day

I hope you have enjoyed this week with the stamp set Layered Letters.  It truly is a wonderful alphabet set.  I have one last project to show you.  The inspiration for this came from the Baby card I showed you yesterday.  I like to keep various cards on hand for a last minute need.  Baby cards are tough though.  I never know which gender I might need, so I end up making them neutral colors.  It has also been 6 years since I was on the receiving side of the baby card.  Things have sure changed in that short time and now, gender reveal announcements are all over the place.  I live far from my family, how cool would it have been to announce the gender with a card.


The Layered Letters Stamp Set has several additional symbols.  I used the # sign the other day.  How perfect is the ? sign for this project!  I used my Stampin' Write marker to draw in the apostrophe.  Then of course we have the REVEAL!  (And so my blog reading family and friends know--I am NOT having another baby!)


How much do you love that cute print used inside the explosion box?  It is from the Go Wild Designer Series Paper Stack.  And the ribbon?  I loved the Stitched Satin Ribbon in the last catalog.  I was so glad to see them get 5 fresh colors for it this catalog.  

PRODUCTS USED:
 
Built for Free Using: My Stampin Blog

My Demonstrator Website

Wednesday, June 24, 2015

Layered Letters--Day 3

The stamp set is called Layered Letters, but I haven't showed you the layered part yet this week.  Today I have LAYERED letters meets Weekly Deals.  This stamp set is perfect for making monogrammed projects for your friends.  It can be easily adapted to place cards or name tags also.


There are two shapes in the stamp set that you can "layer" the letters on top of.  There is the rectangle shown on this project and a circle shape.  To give it the layered look I stamped off the rectangle on my Grid Paper (#130148) and stamped the letter full strength with Melon Mambo Ink.
I used a few of the products from the Weekly Deals this week.  The Mini Treat Bag Thinlets (#137547) are on sale and make this cute little bag.  There are also thinlets in the set to punch 3 different trims, I used the hearts trim on the tag.  There are several other thinlets in the set to add to your projects.  The Silver Glimmer Paper (#135314) used for the tag is also on sale this week.

TIP:  The tag is tied at the top with the Jute Ribbon.  I cut a 6" length of Jute and trimmed off about 6 of the strands in one strip.  After looping it to the tag I pulled apart the rest of the Jute strands.

PRODUCTS USED:
Built for Free Using: My Stampin Blog


WEEKLY DEALS:  Update automatically to show the current deals.
Built for Free Using: My Stampin Blog


My Demonstrator Website

Friday, May 29, 2015

Stampin' Addicts Blog Hop--2015-2017 In Color

Welcome to the next stop on the Stampin' Addicts In Color Blog Hop.  If you have been following the hop from the beginning you just came from Krystal's Cards .  If you started here, don't worry it will loop all the way around so you will get to see all the blogs on the hop.  


I probably say this every year, but I am IN LOVE with the New In Colors!  I simply adore them all.  I chose Tip Top Taupe to feature on this hop.  I love the diverse uses this shade can have.  It can be a neutral to help balance the other colors.  It is perfect for masculine or sympathy cards.  It also just has a classy look when used on its own.  Well, you came here to see the projects, so here they are.

To really show off this color, I went with monochromatic cards.  First, I have a gift set for you.  These are simple to make, but have just the right amount of WOW to make someone truly smile when they receive them.  I used my diagonal score plate to create the criss cross design on both.  The bag was made with the New Gift Bag Punch Board.  TIP: Score the lines on the bag after you cut the shape and before you assemble the box.  The flower is done in two layers.  I stamped onto Vellum Cardstock, punched it out and layered it on the same flower in Whisper White.  I used lots of Pearl Accent Jewels to dress up this gift set.  And what about that Lace Trim?  I challenge you to pick just one to order.  Yeah, that's what I thought.  I got them all too.  


My last project for you is a subtle card for our hard working soldiers.  The FA in my blog address is for the Army Field Artillery.  To help tone the brightness down on the Whisper White I sponged the areas with a little Tip Top Taupe.  My favorite part of this card is the Linen Thread to simulate the barb wire found on most fences surrounding military training areas.  I am so glad this stamp set has been carried over for another year.  

Enjoy the rest of the Blog Hop.  Next is Watermelon Wonder with Twila.


My Demonstrator Website

Tuesday, May 19, 2015

In Color Bohemian Inspired Purse

I am loving these new products.  The NEW In Colors for 2015-2017 are wonderful.  Here is a card purse inspired by the new Bohemian Designer Series Paper.  The images are from a new Bohemian Borders Stamp Set available June 2nd.  
I stamped the image over and over in the new In Colors.  I also stamped one of the boarders along the trim and handles.  Check out that new 1" Dotted Lace Trim.  The purse holds 5 standard size cards and envelopes.  Be sure to check back tomorrow for the cards.

PRODUCTS USED:
Built for Free Using: My Stampin Blog


My Demonstrator Website

Friday, May 8, 2015

Teacher Appreciation Week--Day 4

For Day 4 of Teacher Appreciation Week, I gave each of my child's teachers a Gift Card to Starbucks.  Of course I wanted a special way to package it.  I am a Paper Pumpkin Subscriber.  A couple of months ago the perfect project came in the mail in the little red box.  


Teachers just want to hear "Thanks".  The kit came with enough pieces for 8 expandable cards and little boxes.  If you are a Paper Pumpkin Subscriber you can order from a selection of past kits.


Paper Pumpkin is the perfect gift for anyone or even yourself.  Everything you need to complete the monthly project comes in the box straight to your mailbox.  The cost is only $19.95 + tax (including shipping) per month.  You can skip a month or cancel at anytime.  If you subscribe to Paper Pumpkin by the 10th of the month, you will receive that month's kit.  If you subscribe after the 10th your first box will come the following month.  You can get multiple subscriptions.  I have two.  One for me and one for my daughter.  You can also gift a subscription to someone.  Simple order a Prepaid Subscription from my online store.  You can order 1,3,6 or 12 months.  You will receive an email with the code to redeem for the subscription.  I will even email you a gift certificate you can print out and fill in with the redemption code for your special person.

My Demonstrator Website

Thursday, May 7, 2015

Teacher Appreciation Week- Day 3

It has been raining a lot in our area the last few weeks.  This is bringing about lots of little sniffles in the school.  To help both fight the germs and celebrate our teachers this week, I gave each of my child's teachers a 30 oz. bottle of Hand Sanitizer for Day 3 of Teacher Appreciation Week.


I made a simple band out of 11" strips of Tempting Turquoise (2-1/2" wide) and Whisper White (3-1/2" wide) Cardstock.  I used another RETIRING stamp set for the tag.  Lots of Thanks (Wood #129687, Clear #129690)  is wonderfully versatile for all your "thank you" needs.  I stamped the image on a 5-1/2" x 1" piece of Melon Mambo.  It is layered with a 5-1/2" x 1-1/4" piece of Old Olive embossed with the Fancy Fan Embossing Folder (#127751) and a 6' x 1-1/4" piece of Sweet Taffy Designer Series Paper (#133693).


I punched the Blossom Punch (#125603) three times.  I curled the petals and cut the top one so the the petals would fold up further.  I used the Paper-Piercing Tool (#126189) to make the hole in the center of the flowers for the Antique Brad (#117273).  I looped an 18" piece of Old Olive 1/8" Taffeta Ribbon (#119256) to simulate leaves.  I held all the pieces together with bits of Sticky Strip (#104294).

PRODUCTS USED:
   
Built for Free Using: My Stampin Blog


My Demonstrator Website

Wednesday, May 6, 2015

Teacher Appreciation Week- Day 2

Like I said yesterday, it is Teacher Appreciation WEEK!  For Day 2, I made my children's teachers a gift for them and not their classroom.  Every teachers needs a few minutes each day to unwind.  I gave them some tea and cookies to relax with at the end of their hard day.

The box is actually easy to make, even though there are a few parts to it.  All of mine were made with Daffodil Delight Cardstock (#119683).
1) The base box.  I used a piece of 7x8 cardstock and scored on all three sides at 2-1/2".  I then cut up the flaps and adhered the sides with sticky strip (#104294).
2) (Hard to see in photo) There is a center handle inside the box.  I took a piece of cardstock 3 x 11 and scored at 3/4", 5-1/2" and 10-1/4"  I folded it in half and did use some sticky strip so it wouldn't pucker.  Then I adhered it to the inside bottom of the base box with sticky strip.  I then punch a slot near the top with the Word Window Punch (#119857)
3) One one side a made little compartments for the biscotti to stand in.  The cardstock is 2x4 and scored at 1-1/2" and 2-1/2".  A little bit of sticky on each end and it will make a divider in the center on the side.
4) For the other side a wanted to make it a little stronger to help balance the box when held by the handle.  The cardstock insert is 2x9 scored at 1", 2", 5", and 6".  I didn't use any adhesive.  It is just slid in to add strength.

The decorative band is from the Park Lane Designer Series Paper Collection (#133694).  It is 12x3 and scored the long way at 1/2" so the other side shows on the top band.

For the tag I stamped the image from the RETIRING stamp set Chalk Talk (Wood #130631, Clear #130634) in Calypso Coral and Blackberry Bliss.  I cut out the word "SOMETHING" with paper snips and adhered it to the tag with Dimensionals (#104430).  The tag is cut out with the coordinating Chalk Talk Framelits (#129983).  I added a 1/2"x11" strip of Blackberry Bliss Cardstock to the bottom of the box and tied a piece of 3/8" Stitched Satin Ribbon (#133668) to the top of the box.  A few Pearl Basic Jewels (#119247) were used to dress up the tag.  

PRODUCTS USED:
Built for Free Using: My Stampin Blog


My Demonstrator Website

Tuesday, May 5, 2015

Teacher Appreciation Week Day 1

This week is Teacher Appreciation Week.  As a former teacher myself and home schooler for two years I fully appreciate all that our teachers do for our children.  I decided to do something special for my children's teachers each day this week.

On Monday, I gave each of them a pack of dry eraser markers.  With the end of the school year coming, I know that teacher supplies are scarce.  My daughter told me how much her teach would love the gift, "My teacher doesn't have any ink left in her markers."


Two of the products I used to make the gifts are on special this week (May 5- May 11) for WEEKLY DEALS.  I made the box with the Gift Box Punch Board (#135863).  Instead of closing the top of the box, I folded the flaps down over top of the Sweet Taffy Designer Series Paper (#133693).


The Tag was made using the RETIRING Stamp Set Starburst Sayings (Wood #133182, Clear #133185).  I stamped in both Pumpkin Pie and Old Olive.  I cut out the word "WORLD" and mounted it using dimensionals.  The image is cut out with the coordinating Starbust Framelits (#132967) and mounted on a 2-1/2" Circle (#120906).

PRODUCTS USED:

Built for Free Using: My Stampin Blog


My Demonstrator Website

Wednesday, August 28, 2013

Envelope Bag--SA Recycled Challenge #2

Stampin' Up! has a fantastic new product coming out on September 1st, an Envelope Punch Board.  You can make 66 different sized envelopes from a piece of paper.  The measurements are right on the Punch Board for all the envelope sizes.  So easy to use and the tools are all part of the system, no changing things in and out to finish your custom envelope.

It is fantastic for making envelopes, but you can make other things with it as well.  I made a custom 5" by 7" envelope and turned that into packaging for some cards.  You can see a wonderful video for this on Stampin' Addicts.  First I closed all the seams of my custom envelope with sticky strip.  Then, I scored three sides of the envelope 1/2".  The forth side I cut off just enough for it to open.  When you fold it open you get this cute little 4-1/2" x 6" x 1" box.  Fits standard cards and envelopes perfectly.    I then stamped all over the front with my Gorgeous Grunge Stamp Set and Off the Grid Stamp in Crumb Cake, Early Espresso and Illuminate Glimmer Ink (shows better in person).    A quick torn belly band and a simple Thanks! label with the Window Frames Collection Framelits.
You can see more Envelope Bags on Pinterest.  Go to the Recycled Challenge #2 board on the Stampin' Addicts Page.

PRODUCTS USED: 
STAMPS: Gorgeous Grunge (WM#130514, CM#130517), Yippee-Skippee (WM#131341, CM#131344), Off the Grid (#130736)
COLORS: Pumpkin Pie, Crushed Curry, Crumb Cake, Early Espresso, Soft Suede, Very Vanilla, Illuminate Glimmer (136857)
ACCESSORIES: Crushed Curry Chevron Ribbon (#130019), Window Frames Collection Framelits (#129021), Big Shot (#113439) 

Order Online 24/7 at My Demonstrator Website

Monday, August 26, 2013

UPCOMING BANNER CLASSES

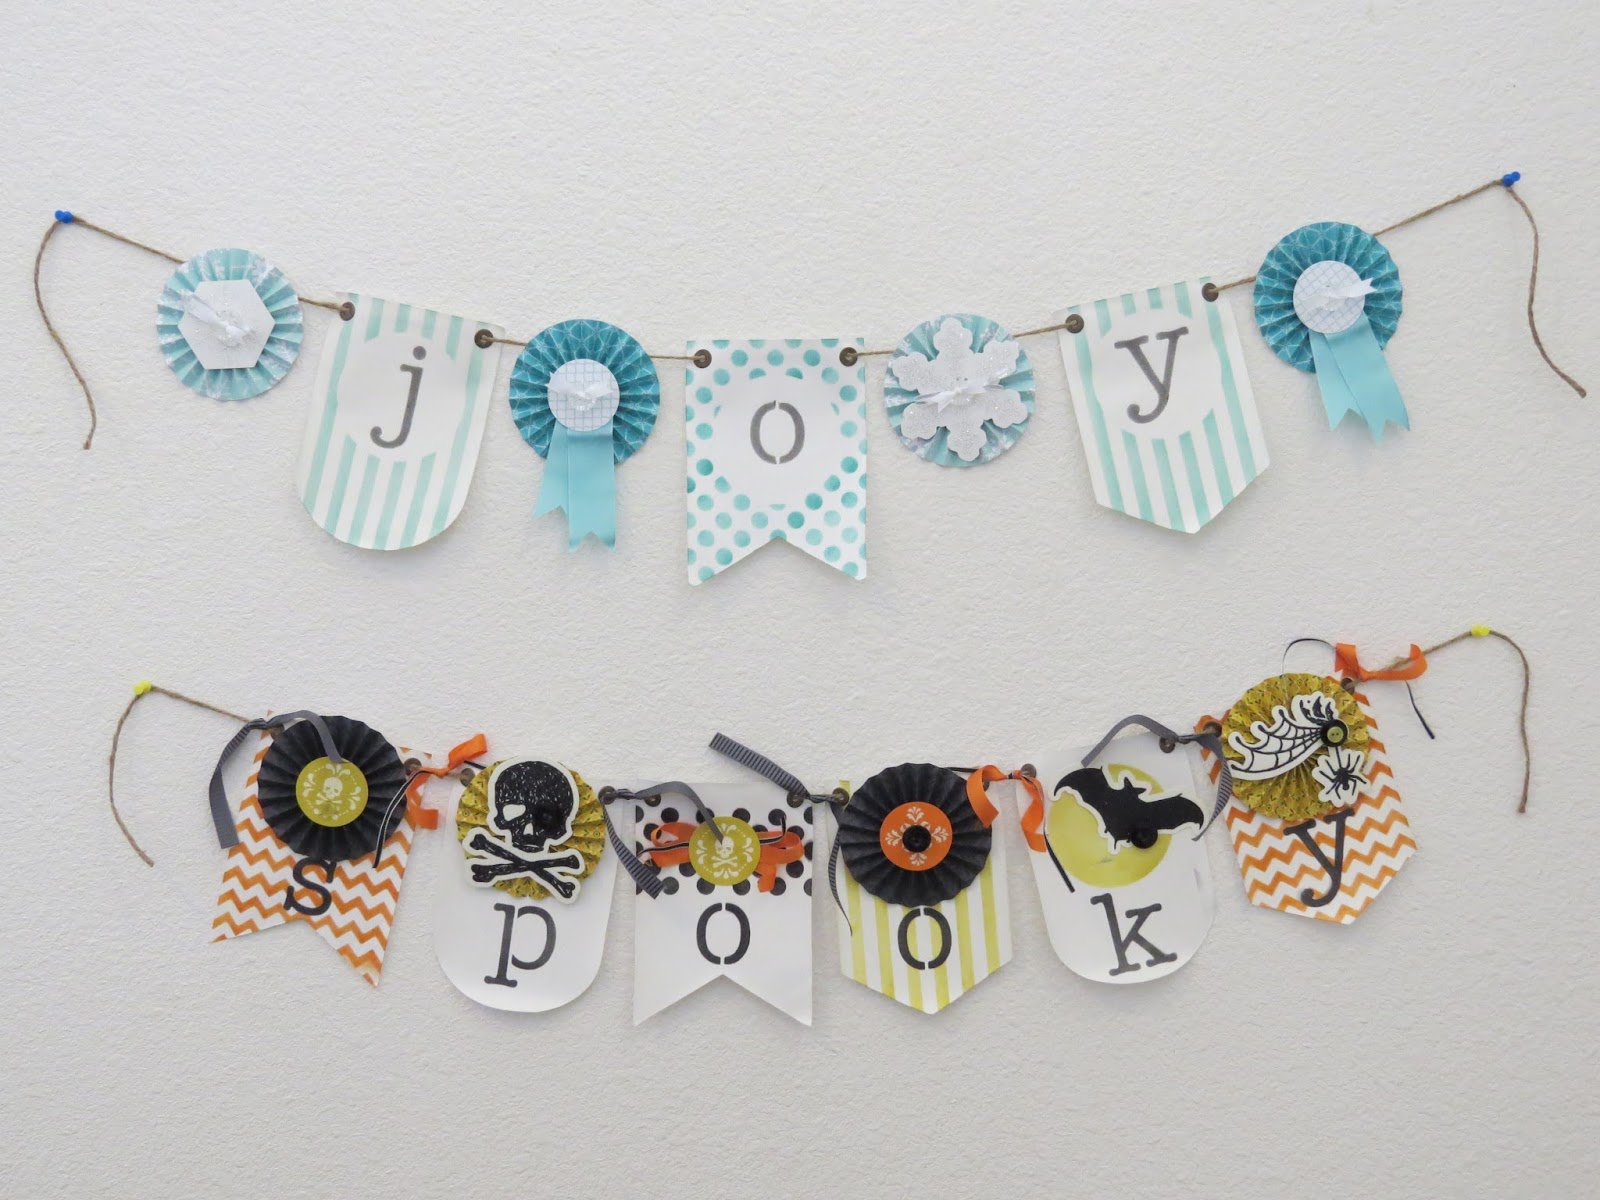
Have you seen the Build-A-Banner products in the Holiday Catalog.  How totally cute are these?  I could not resist and got all of the items, then sat down over the weekend and made 3 banners.  One each for Halloween, Thanksgiving, and Christmas.  I had so much fun making mine, that I thought it would be great to have a class for everyone to make their own.

Each banner is Approximately 3 Feet long.  Each flag measures 5" by 7".
December 7th--"Joy" Banner
October 5th--"Spooky" Banner
November 2nd-- "Thanks" Banner
"Give" additional $5 
WHEN:  These classes will be held as a 3 part series on the first Saturday of each month (Oct-Dec) @ 1:00pm.  Please give approximately 2 hours to assemble your banner at the class.  Some people may work faster, others slower, and some supplies need to be shared.  You can sign up for one, two or all three classes. 

WHERE:  All classes are held in my home on AMR.  Classes will be limited to 8 participants at each class. 

COST:  Each class is $25* (see November class note below) with payment due 10 days before the class date.  Prepay for all three classes by September 25th for only $70 and receive the “give” banner tier for free.

*November class is for the “thanks” tier.  You can add the “give” tier for an additional $5 or receive it for free with prepayment for all three classes by September 25th.


THINGS TO BRING:  Absolutely nothing.  All supplies will be provided at the class. 

HOW TO REGISTER:  You can email me at fa_stamper@sbcglobal.net, call me at (580)483-3758 or leave me a message on my business FACEBOOK page.  Search for Kathleen Brill-Myrice Demonstrator.  I will then contact you for your payment.  Your registration cannot be confirmed until payment is received. 


PRIVATE CLASSES for these banners are available.  Contact me for available dates.  Private classes must have a minimum of 6 people and must be prepaid in full 10 days before class date. 

My Demonstrator Website

Friday, August 9, 2013

Stampin' Addicts Fall Blog Hop

Welcome to stop #7 on this hop.  If you have been following the Hop you just came from Rhonda's Blog.  Isn't she great!  She is a great stamper and I am so blessed to call her my friend too.  If you started here, you can stay here and follow the Hop until it loops its way back around.  If you want to start at the beginning please go to Heidi's Blog.

If you have never seen a Blog Hop before you are in for a treat.  11 Demonstrators from Stampin' Addicts have brought you projects featuring the Fall Products from the 2013 Stampin' Up! Holiday Catalog.  I have 4 projects featuring the Halloween Bash Stamp Set, so lets get started.

What is the first thing we do when having a BASH?  We send out invitations.  I colored the image with my Stampin' Write Markers in Basic Gray, Basic Black and Pumpkin Pie.  The torn edges were colored with the NEW Smokey Slate Marker.  It is hard to see in the photo, but the black background area has a fuzzy texture to it.  Come back next week for tips on how to do that.  The little creepy crawly fellow is from my Halloween decorations.  A cheap embellishment this time of year.  And how about that envelope?  The NEW Envelope Liners Framelit Dies can make any envelope just jump out at you.

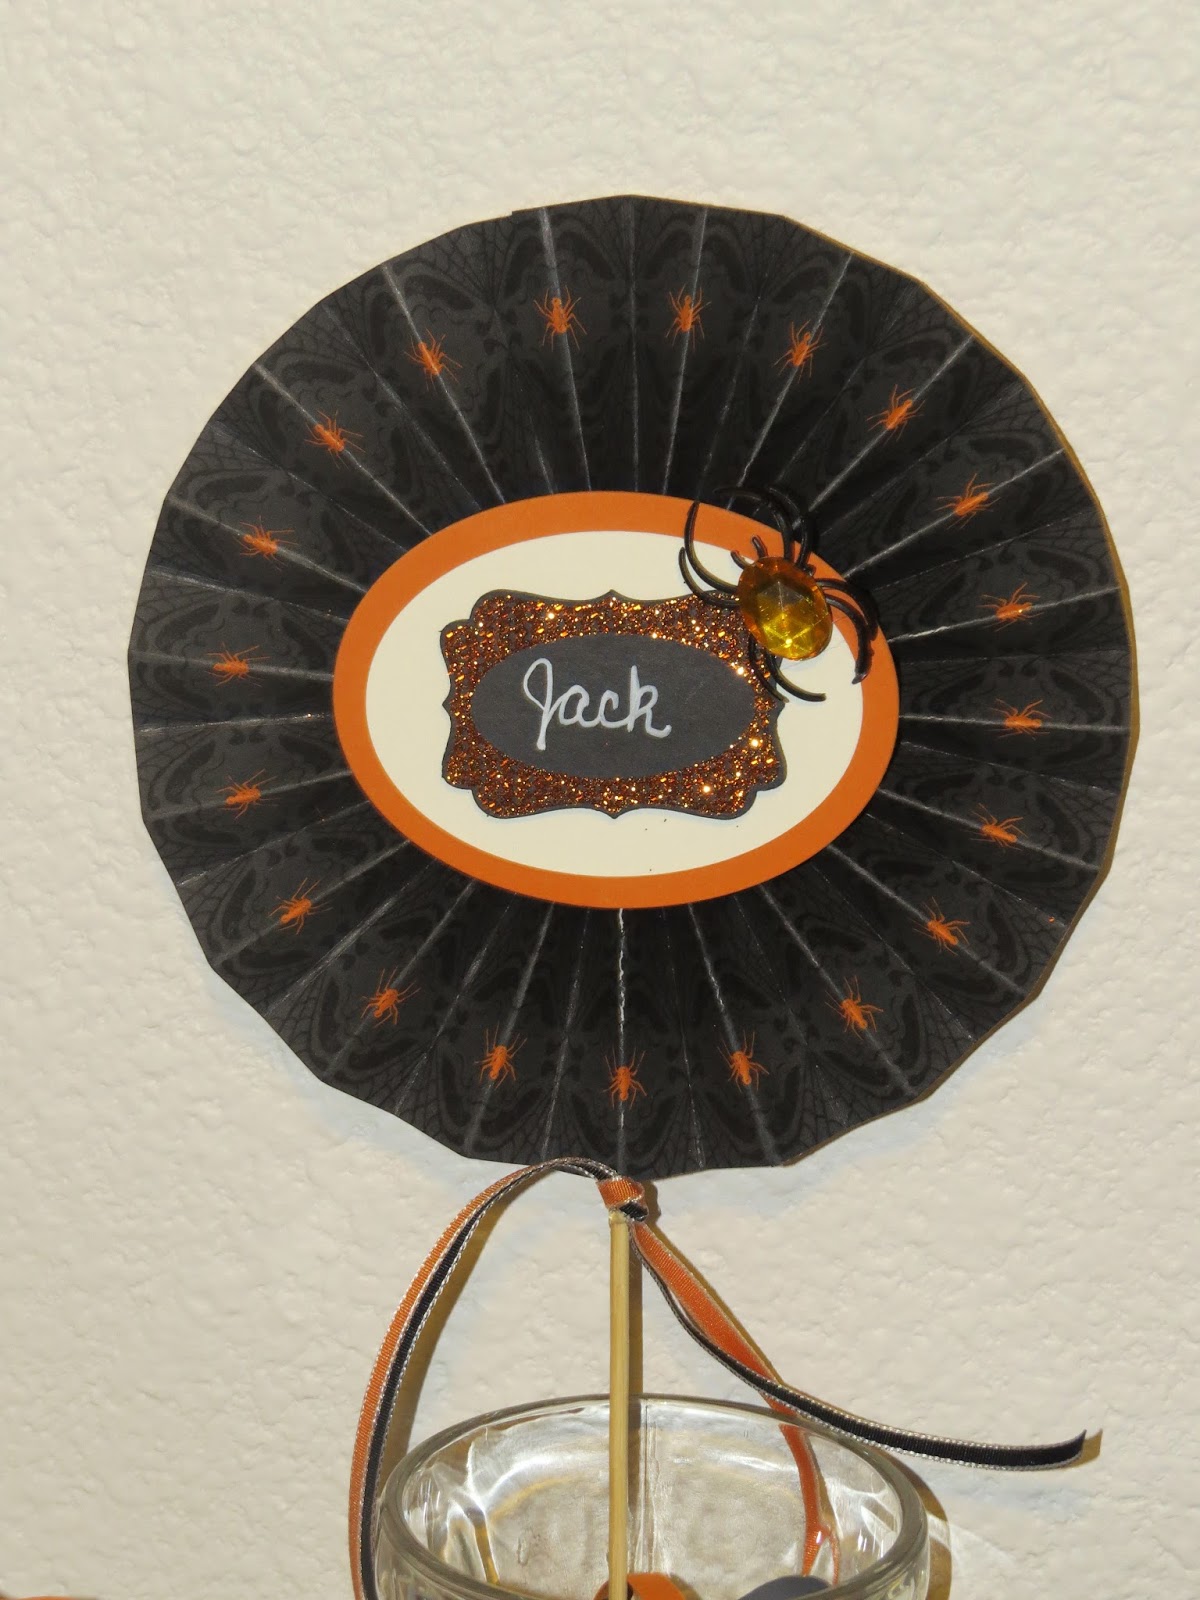
We want everyone to find their place at the party.  Here is a fun decor project.  I made the rosette using the Witches' Brew Designer Series Paper.  I lined up the paper in my Paper Cutter, so they spiders on the print were near the outer edge.  I then used my scoring tool to score the fold lines.  There is no perfect measurement to score this at.  I moved the DSP around so the groove of the tool was in the center of the spider or his web area.  I stamped the label in versamark ink, then used heat and stick powder to adhere the orange glitter.  The name is hand written with the NEW Chalk Marker.

Once everyone has found their seat you want to have a little treat for them.  The treat topper features the Label Framelits turned both directions.  Again, I colored the stamp with my Stampin' Write Markers.  Add a little something with a glitter covered background.  (More details on that next week).  For those looking for the worms, I found them in the Hawaiian treat section of my store.  They are Li Hing covered Sour Worms.  "Eat If You DARE!"

To round out our table setting, we have a simple little package for holding the silverware.  A little distress marks from the Gorgeous Grunge Stamp Set.  Be sure to check back next week for more photos and details on how to make these projects yourself.  But now, it is on to the next stop at Mary's Blog where she is going to show you some fabulous uses for the Witches' Brew Designer Series Paper and Washi Tape.

Sunday, July 28, 2013

3D Swap for Convention

I found myself all packed, ready to go to convention with 8 hours to spare this year.  All my card swaps were done and I was just waiting out the time till I could go to the airport.  What is a stamper to do?  Make more swaps.  I sat at my work table, got out my Big Shot and went through my dies.  The Petite Purse Die has been sitting there patiently until I was ready to use it.  So Glad I Did!!

These were a hit at convention.  I thought it was so simple.  Maybe that is what appealed to everyone.  My only problem.....I forgot to put my name on them.  As you can see again, I am in love with this years In Colors.  The Stretch Ruffle Trim is fabulous also.  You can stretch it out for a less ruffled look if you like.  I used it in its unstretched full ruffle form.

The flower on front was made with three punched out 1-1/4" Scallop Circles.  I used the In Color Designer Series Paper Stack.  I crunched them up by hand and held it to the purse with a brad.

The Ruffle Trip was put on in two strips that shared the handle space with some sticky strip.  These are fast to make and perfect for just about any occasion.  I'm thinking wedding favors, baby shower or little girl birthday.  They hold a few pieces of small candy.  I put Chocolate Covered Macadamia Nuts in mine.

PRODUCTS USED:
Stamps: None
Cardstock: 2013-2015 In Colors #131200
Accessories:  Big Shot #113439, Petite Purse Bigz L Die #125606, 2013-2015 In Color Designer Series Paper Stacks #130136, sticky strip #104294, 1-1/4" Scallop Circle Punch #127811, Ruffle Stretch Trim (available in all 5 In Colors)

Ruffle Stretch Trim Product Order Numbers
Pistachio Pudding #130020
Crisp Cantaloupe #130021
Baked Brown Sugar #130022
Strawberry Slush  #130023
Coastal Cabana #130024


Order products online 24/7 at My Demonstrator Website

Monday, December 31, 2012

Clear Case Scrapbook

Thank you to everyone who visited my blog for the Stampin' Addicts Blog Hop this last weekend.  If you missed it, you can check it out HERE>.  There were some fantastic projects from my Stampin' Addicts friends.  You should also check out the Stampin' Addicts website.  We are a FREE website for those "Positively Creative!  Positively Stampin' Up!"  
Here are some more details on the Clear Case Scrapbook I showed on the hop.  The outside insert for the case is 7" x 10.5" and scored at 5" and 5-1/2".  When designing your outside cover insert, it is best to keep things flat and not use a lot of layers.  Bulky objects and layers will put stress on the case plastic and can tear over time.  When you are done creating the cover, open the case and slide the insert between the plastic case and the thin plastic cover.  


For the inside there are two main pieces each measuring 7" x 5".  I adhered them to the left and right side of the inner case with snail adhesive.  If you put a lot of things inside your case, you may want to consider using sticky strip for a stronger bond.  There is nothing along the spine area of the case.  I used the same Daffodil Delight color for the inside as I did for the outside.  I kept my inside very simple this time, but you can easily add embellishments to the inside of the case.  BEWARE--When the case closes anything that spans the two pages will shift.  The strip of Designer Series Paper I have at the bottom is only adhered on the right side or the case.  The left side is tucked under the photo so the paper will slide in and out as the case is opened and closed.  If you need more space for photos you can put some on the back area of the case or even create a folded page inside to open and expand for more space.  

OTHER USES:
These cases are great for little keepsakes.  They come in a set of 4.  Since they don't have any inserts for DVDs they are ready to use.  They are easy to mail without the photos risking being bent.  Perfect for grandma, traveling parents, or friends you are far apart from.  They are also great for your desk at work.  You can fit a lot of photos in one small area and keep it in your desk drawer easily for the time you need a quick smile on a rough day.  Since the cases fit on any media rack, you can make individual ones for a series of events.  No need to move around pages in a scrapbook and you can easily put in 3-D items like a first tooth or bracelet from the hospital.  
Enjoy creating your own Clear Case Scrapbook.  

Products Used
Stamps:  Feel Goods (wm# 129681, cm#129684)
Colors: Daffodil Delight, Cherry Cobbler, Parker's Patterns DSP (#131021)
Accessories:  Clear-Mount Stamp Case (#119105), Oval Framelits (#129381), Scallop Edge Border Punch (#119882)

Items from the 2013 Spring Catalog are available from Jan. 3-May 31, 2013.


BLOG CANDY WINNER
Congratulations Rhonda G.  You are the winner of the "Bootiful Occasions" Stamp Set.  Please email me your address and will send your stamp set to you.  Thank you to everyone who commented on my Blog Hop Projects and Liked my Facebook Page.

Friday, December 28, 2012

Stampin' Addicts Blog Hop for 2013 SU! Spring Catalog

Welcome to this stop on the Stampin' Addicts Blog Hop.  This Blog Hop features stamp sets from the Stampin' Up! 2013 Spring Catalog with projects from Stampin' Addicts Demonstrators.  If you have been following the hop you came from Debra's page where she was "Just Thinking".  If you started here, welcome.  You can view the entire hop by following the links at the bottom of each post.  They will take you through all 14 stops.

ON WITH THE SHOW--I am featuring the "Feels Good" Stamp Set found on page 21 of the Spring Catalog.  There are 5 stamps in this set and I have 3 projects to show you today.  The catalog was previously known as the Occasions Mini Catalog and this stamp set is perfect for those non-holiday OCCASIONS that fill our lives.

My first project is a Twisted Card for a CONGRATULATIONS OCCASION.  It was originally created by a member of my extended SU! family, Kelly Gettelfinger.  I have several friends who train to run in marathons.  A couple of them have completed their first half-marathon (13.1 miles).  On the inside pocket I put a 13.1 sticker for them to proudly display on their car window.


My second project is a Treat Bag made from one sheet of 12"x12" cardstock and perfect for a THANK YOU OCCASION.  It features the Window Frame Framelits that will carry over into the Spring Catalog.  Any of the stamps in this set would work wonderfully on this bag.  The bag can also be easily made to form a 6"wide x 2"deep x 5"high gift box.


My last project is a Clear Case Photo Box for the OCCASION WHEN YOU NEED A SMILE.  These are the same clear cases that Stampin' Up! uses for their wonderful stamp sets.  You can purchase them separately from your demonstrator in a pack of 4.  It is best to keep the front flat and put any 3-dimensional embellishments inside.  I made this box for the OCCASIONS when my soldier husband is away from home and misses our kids.  They are also great for grandma or long distance friends.

For more details on any of these projects, check back this coming week.  I will have measurements, tips and more photos.  The next stop on the blog hop will take you to Sara's for "A Little Bit of Spring".


BLOG CANDY--No blog hop would be complete without a little bit of Blog Candy.  I recently Celebrated two OCCASIONS.  First I passed my 7 year anniversary as a demonstrator in November and then I passed my $50K in career sales milestone this month.  I am giving away the "Bootiful Occasions" stamp set from page 50 of the SU! Annual Catalog to a random winner.  You can enter once by leaving a comment here on this blog post.  You can get a second entry by following me on my Facebook Page.  I will draw a random winner on Monday.