Friday, August 28, 2015

Stampin' Addicts 2015 Holiday Catalog Fall Blog Hop

Hello hoppers!  Most of you just came from Tanya's Blog.  Wasn't that a cute stamp set?  So much fun and so many uses.  If you came here directly, don't worry, just follow the links on the hop and it will loop you all the way around back to here.  We love to hear from you about our hops and projects.  You can leave a comment on any of the stops or leave a comment on the discussion thread at Stampin' Addicts.

I am featuring the Sweet Hauntings Stamp Set (#139705) from page 47 of the 2015 Holiday Catalog.  I have had so much fun showing this stamp set on my blog last week and have 3 more projects just for this hop.  There are so many uses for this stamp set.  There are 3 images that fit the Note Tag Punch (#135860), 4 different potion bottles, and 2 sayings that tie everything together.  My family LOVES Halloween.  We enjoy having our friends (of ALL ages) over for a night of spooky food and fun.


First I have a great party invitation for you.  I stamped all of the potion bottles on the front of my card, then colored them in with various Stampin' Write Markers.  TIP:  I used my grid paper to line up all the stamps, then put them on one block so they will be straight when I stamp them.  Under the bottles is a piece of the bat print washi tape from the Happy Haunting Designer Washi Tape (#139608).  I stamped one of the sayings from the stamp set in Cucumber Crush on the bottom.  A few quick tid bits to decorate the upper corner, my party information on the inside and I am ready to invite my guests.

I love to have cute little treats for my kids to take to school.  This is the medium size treat bag from the Gift Bag Punch Board (#135862).  NOTE: The size of the bag refers to the size of the bottom of the bag.  You can make the bag as tall or as short as you like to fit your treats.  Again I stamped several of the bottles at once on the bag, then put another print from the Washi Tape around the bag.  I made a simple topper for the bag.  I folded a piece of Tangerine Tango cardstock in half and attached a Spider Web Doily (#139622) with a glue stick.  I wrapped the extra edges of the doily around the cardstock.  This is the other sentiment from the stamp set, stamped in Rich Razzleberry to match the bag.  The back of the topper is attached to the bag and I used a small bit of velcro to hold the front closed.  


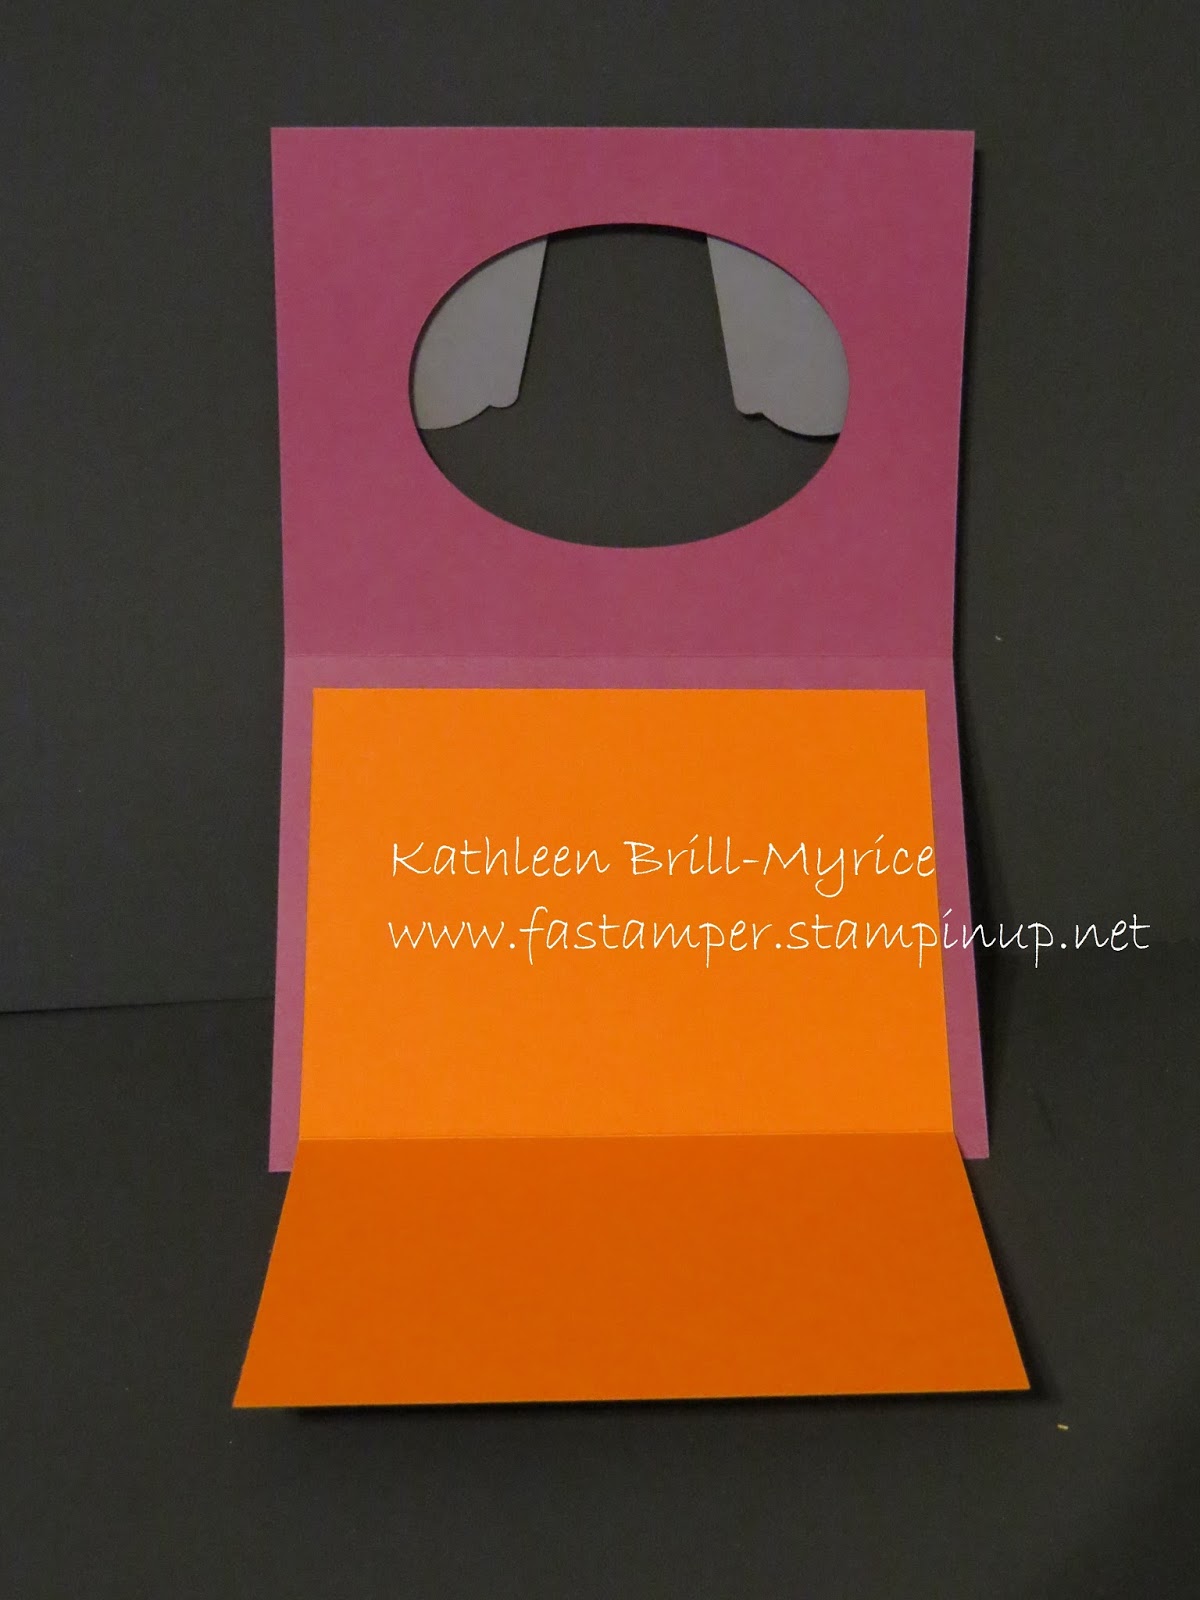
For my party guests I have a treat basket.  I used my markers to color certain parts of the Note Tag shaped stamps.  They make cute tombstone images.  The center one was stamped again on cardstock and cut out to raise it up on dimensionals.  The basket was made with the Berry Basket Die (#137366) from the Annual Catalog.  I tied a piece of Rich Razzleberry Cotton Ribbon (#134564) around the top of the basket.  You can see a piece of Rich Razzleberry cardstock peaking through the slits near the bottom.  I took a 5-1/2" square piece of cardstock, scored it on all four sides at 1-1/4", folded on the score lines, made a few quick slits to shape it into an open box.  I punched a circle in the center of the insert to hold a cupcake.  
I know a picture would be great, but there was an "accident" with the cupcake.  You could of course fill the basket with a bag filled with candy or other treats.  

I hope you enjoyed my projects with the Sweet Haunting Stamp Set.  If you did, please leave me a message below before going to the next stop on the hop.  The next stop is Carmen with some Hall-O-Ween Treats.


My Demonstrator Website

Monday, August 24, 2015

Haunting Fun Fold card

I have a fun card for you today.  The Sweet Haunting Stamp Set has 3 images that resemble tombstones.  So of course I had to make a little graveyard card.


Again, I used a marker to ink just the area I wanted.  Then I wrote in the space.  I first cut the oval in the Designer Series Paper.  I attached it to the card front and cut the oval from the Rich Razzleberry cardstock.  I have another bat made with the Sweetheart punch.  

When you open the card the Happy Halloween tombstone is layered on another print from the Happy Haunting DSP.  But where do you write your message without it showing through the oval?


Well you make it open one more time of course.  The Tangerine Tango panel fold open to reveal a large space for a message.


I hope you have been enjoying my Sweet Haunting projects.  I will be back on Friday with more as part of the Stampin' Addicts Holiday Catalog --Fall Blog Hop.  Many talented stampers will be sharing their creations with Fall/Halloween themed products from the Holiday catalog that comes out next week.

PRODUCTS USED:
Built for Free Using: My Stampin Blog


My Demonstrator Website

Friday, August 21, 2015

Quick Haunting Favor Boxes

I wanted to show up a few more of the prints in the Happy Haunting Designer Series Paper.  What better way than with a quick project.


I made these boxes with the Gift Box Punch Board.  I used a 6x6 piece of cardstock to make a 1.75" box.  They are simply tied shut with a piece of ribbon.  I made the tags with the Sweet Haunting Stamp Set.  By using markers to color the stamp I was able to use just the decorative border on the stamp.  This let me write my own tombstone names on the tag.  Simple and fast for personalized classroom or party favors.

Thank you for joining me this week for a sneak peek at some Halloween themed products coming soon in the Holiday Catalog.

PRODUCTS USED:
Built for Free Using: My Stampin Blog


My Demonstrator Website

Thursday, August 20, 2015

Boo Card

Many times when making a project I make some of the parts more than once.  For yesterday's doorknob banner I made the "BOO" pumpkins a couple times.  I didn't want the other one to go to waste, so I looked around on my desk for more things to use.  I found a Rich Razzleberry oval (from a project I have yet to share) and the following card was born.


I am in love with the Happy Haunting DSP (#139584).  The prints are so much fun.  The bat was made with the Sweetheart Punch (#133786).  I punched out a heart then moved the punch up to cut out just the top part to look like wings.  The grass at the bottom is done with the Fringe Scissors (#133325).  This would make a great card for your child's teacher or grandchildren who live far away.
PRODUCTS USED:
Built for Free Using: My Stampin Blog


My Demonstrator Website

Wednesday, August 19, 2015

BOO Banner

I know it is only August, but I am on a major Halloween kick.  I can't wait for real fall weather to get here, go pick some pumpkins and put up my outdoor decorations.  I was looking at the Spider Web Doilies I have used the last two days and thought about how to use them on a banner.  I decided not to go with a long spelled out banner, but more of a door knob hanger.  This would go along great with the "You've Been Boo'd" neighbor treats.


Stampin' Up! reconfigured the Build-A-Banner Kit this year.  I really like the new shapes to the banner pieces and they have added some templates to sponge decorative edges on them.  Here is the scalloped edge banner with the dotted template.  I used a Sponge Dauber to apply the Rich Razleberry ink to the banner piece.  The "BOO" is done with the Layered Letters Stamp Set.  I used a Stampin' Write Marker to draw on the pumpkin stems before cutting out the piece with my scissors.  I attached the doily and "BOO" to the banner with some Multi-purpose Glue.

PRODUCTS USED:
Built for Free Using: My Stampin Blog


My Demonstrator Website

Tuesday, August 18, 2015

Candy Bar Halloween Treat

I have another project today with the Sweet Haunting Stamp Set.  Just like the title of the stamp set, this project is sweet.  One of the Note Tag Punch shaped stamps in the set says "DEATH BY CHOCOLATE", so of course we need a chocolate treat.  How about a full size Hershey bar?  I can think of lots of people who would want one of these everyday.


I first wrapped the chocolate bar with another piece (5-1/2" x 5-1/2") from the Happy Haunting Designer Series Paper.  The new Tear and Tape adhesive is wonderful for holding bent papers closed.  This is the other half of the Spider Web Doily from yesterday's project.  I then layered a 1/2" strip of Rich Razzleberry on the bottom and put a couple pieces behind the Tangerine Tango tag piece.  (Exciting New Product Coming--The black ink is a new Archival Black Ink Pad.  Stamps a true black color for those who have been getting a purple tint from our standard Basic Black Classic Ink Pad).  There is a long piece of Black Stitched Satin Ribbon that loops around the candy bar to pull it out of the sleeve.   


Here is the set of projects together.  I love how you can cut the Spider Web Doilies into two pieces to get even more projects and still have a good size impact on your project.  I forgot to mention you get 24 of those doilies in a pack for only $4.50.  What a deal for making a classroom full of treats.  Cut them in half and get two classes of treats for your kids.

PRODUCTS USED:
Built for Free Using: My Stampin Blog


My Demonstrator Website

Monday, August 17, 2015

Sweet Hauntings

We don't normally start to think about Halloween too much in August, but it is fast approaching.  As always, Stampin' Up! is here to help.  September 1, 2015 is the start of the new Holiday Catalog and there are LOTS of new things just for the fall season.  So how about a sneak peek?

Sweet Hauntings is a new 9 piece stamp set coming out.  There are 3 images that fit the Note Tag Punch, 2 sayings and 4 bottles of spooky brews.  It is the ultimate set for your quick party treats.  The tag punch images can be punched out and then attached to any box or bag filled with goodies.  Add in the Happy Haunting Designer Series Paper, Washi Tape, and Spider Web Doilies and you have endless possibilities.


Today I have a simple card using one of the Note Tag images.  The patterns in the DSP are too cute.  I just love the little crows atop of the tombstones and the little jack-o-lantern faces are too cute hiding in the print.  I cut a Spider Web Doily in half and glued it on with a glue stick.  I used a Basic Black, Rich Razzleberry and Tangerine Tango marker to ink the stamp.  I punched it out and trimmed it close to the lines, so it could be layered on the shape punched from Rich Razzleberry. The Razzleberry strip across the card is one of the Washi Tape patterns.

This card would be great for a party invitation or to accompany a gift for a co-worker or neighbor.  Be sure to check back all week for more ideas for your Halloween projects.

PRODUCTS USED:
Built for Free Using: My Stampin Blog


My Demonstrator Website

Friday, August 14, 2015

Creativity or Chaos?

I recently got my pre-order from the upcoming Stampin' Up! Holiday Catalog.  I have a blog hop quickly approaching to showcase some of the Halloween/Fall items in the catalog.  I sat down today and created 7 projects with the stamp set I selected to showcase.  3 of the projects will be used for the blog hop on September 28th.  While I am not yet ready to share any of the projects, I did think you would like this photo that highlights how I work.  Do you think this leads to creativity or feelings of chaos?


I don't think you can see in the photo, but on the right side of my grid paper (under the heart punch) is a list of ideas I jot down for a stamp set (which is on the left side of the photo).  I start with the idea I have the clearest idea for in my head.  In this case it happened to be a gift bag with the Gift Bag Punch Board (now buried on the left side of the photo under all my marker cases).  If I am making more than one project with a stamp set and color pallet I tend to leave things on my stamp table.  I was using one of the new Designer Series Paper Packs from in the upcoming catalog (do you see it?).  I also played a bunch with the Spider Web Die Cuts and Washi Tape (I spy with my little eyes).  If you look careful at my table you will see some hints as to the projects I have coming soon (I see a sweet treat and a kit project).

I will be back next week to share some of the projects with this cute Halloween stamp set.  Until then, I would love to hear about your process for creating.  Are you a messy area person or do you prefer a clean area?

My Demonstrator Website

Thursday, August 13, 2015

July Paper Pumpkin

I can't say enough how wonderful I think Paper Pumpkin is.  Last month's project was no exception.  The July 2015 kit came with supplies to make 8 cards with the "Thanks a Latte" theme.

Let me know what is stopping you from becoming a subscriber.
*Are you worried that you are not crafty enough?  Let me assure you that anyone can do this.  There are step by step instructions (with photos) in every kit.  Paper Pumpkin even has their own YouTube channel to show you how to put your projects together.
*Are you worried you won't have the time to put it together?  Trust me it doesn't take long.  30 minutes and you will have a completed project.  You can also join my on the 4th Friday of the month and hang out while we put our kits together.  I mean, who doesn't want a Friday night out with friends.
*Are you worried you won't like the projects?  Change it up a bit.  Each month I post several alternate projects with the contents of my kit and few supplies lying around my craft area.

Here is one of the alternate cards I made with my kit this month.

To see the other projects, become a subscriber, select me as your demonstrator and I will send you an invite to my Pumpkin Patch on Facebook.  I post all of my alternate ideas each month there.


Reminder:  If you are new to Paper Pumpkin and Subscribe by September10th you will receive 50% off your first two months.  Simply use the promo code "HALFOFF" when you subscribe at PaperPumpkin.com


My Demonstrator Website

Wednesday, August 12, 2015

"Thank You" Workshop Cards--Day 2

Yesterday I share a couple of the cards from a private workshop I had last week.  Here are the last two cards we made.

I turned to the catalog for inspiration on the next card.  I found this card on page 17 in the 2015-2016 Stampin' Up! Catalog.  If you used the Happy Patterns Decorative Masks (#138313) you will get wonderfully spaced dots.  With 10 people rotating through the card making stations, I didn't want to be cleaning the mask between stampers.  Instead we used the eraser on a standard pencil.  I labeled each pencil for the color of ink used.  We used 5 colors from the Subtles Collection.  Calypso Coral, Marina Mist, So Saffron, Wild Wasabi, and Wisteria Wonder.


The last card uses my new favorite background stamp Watercolor Wash (#138704).  We inked the stamp in Mint Macaron and stamped it on the Whisper White Note Cards (#131527). The die cuts are from the NEW Greetings Thinlets (#138275) and the NEW Bold Butterfly Framelits (#138135).

I had a wonderful time with her team.  If you would like to have a workshop with your group, please contact me.  It can be a church group, a scout group or any group who would love to give handmade cards to someone.

PRODUCTS USED:
Built for Free Using: My Stampin Blog


My Demonstrator Website

Tuesday, August 11, 2015

"Thank You" workshop cards

As I mentioned last week, I had the pleasure of doing a workshop for a long time friend of mine.  She is a consultant for Tastefully Simple and asked me to make thank you cards with her team.

We made 5 cards.  I used a past Paper Pumpkin Kit for the first card.  Remember as a subscriber you can order past kits.  The second card was a pinwheel card.  Here is the original one I posted a couple months back.  This time we made the card using the Everyday Chic Designer Series Paper (#138445).

The third card was a twist on a previous card I shared in June.  The original card had stamped images from the Bohemian Borders stamp set.  This time we used the Bohemian Designer Washi Tape (#138386).

Check back tomorrow for the other two cards we made.

PRODUCTS USED:
Built for Free Using: My Stampin Blog


My Demonstrator Website

Monday, August 10, 2015

August Card Shoppe

This Friday is the next date for my Card Shoppe Class.  Guests will make 8 cards (2 each of 4 designs) with envelopes for only $15 or free with a minimum purchase.  The sentiments can be changed to reflect your card giving needs.  This class is offered at two times on Friday.  You can choose 1:00-3:00pm or 6:00-8:00pm.  Both classes are held in my stamp studio.


I have created a Facebook event page for this class.  If you are in the Lawton/Fort Sill area you are welcome to attend.  Feel free to share the event with your SW Oklahoma friends.

Message me with any questions about this class or my other Stampin' Up! class offerings.


My Demonstrator Website

Tuesday, August 4, 2015

Thank You Workshop Fun

I had a great time last night.  A good friend of mine is a consultant for Tastefully Simple.  She has a fantastic team she works with and asked me to come to her team meeting and help them make thank you cards.  I love meeting new people and showing them the love of stamping a handmade card.  There is just something extra special about a handmade card vs. one you buy in the store.  Each person made 5 different cards.  We had stations set up throughout her home for everyone to work on each card.

Here are some of her team members hard at work on their projects.


Of course we had to take a group photo at the end of the evening.  Thank you Regan and your wonderful team.  I truly enjoyed myself and look forward to doing it again.


My Demonstrator Website

Monday, August 3, 2015

Getting Ready for a Workshop

Sorry, I don't have any new projects to show today.  I have a private workshop for a long time friend this evening.  I have been putting together project packets, little gifts and incentives for all of her guests.  Here is a photo of my stash all packed up to take to her home.


Tomorrow I will start sharing projects from her workshop.  

To schedule your own private workshop with family and friends, simply send me an email.  You can also check out my upcoming classes on my Demonstrator Website Calendar.  


My Demonstrator Website