Showing posts with label Fun Fold. Show all posts

Monday, August 24, 2015

Haunting Fun Fold card

I have a fun card for you today.  The Sweet Haunting Stamp Set has 3 images that resemble tombstones.  So of course I had to make a little graveyard card.


Again, I used a marker to ink just the area I wanted.  Then I wrote in the space.  I first cut the oval in the Designer Series Paper.  I attached it to the card front and cut the oval from the Rich Razzleberry cardstock.  I have another bat made with the Sweetheart punch.  

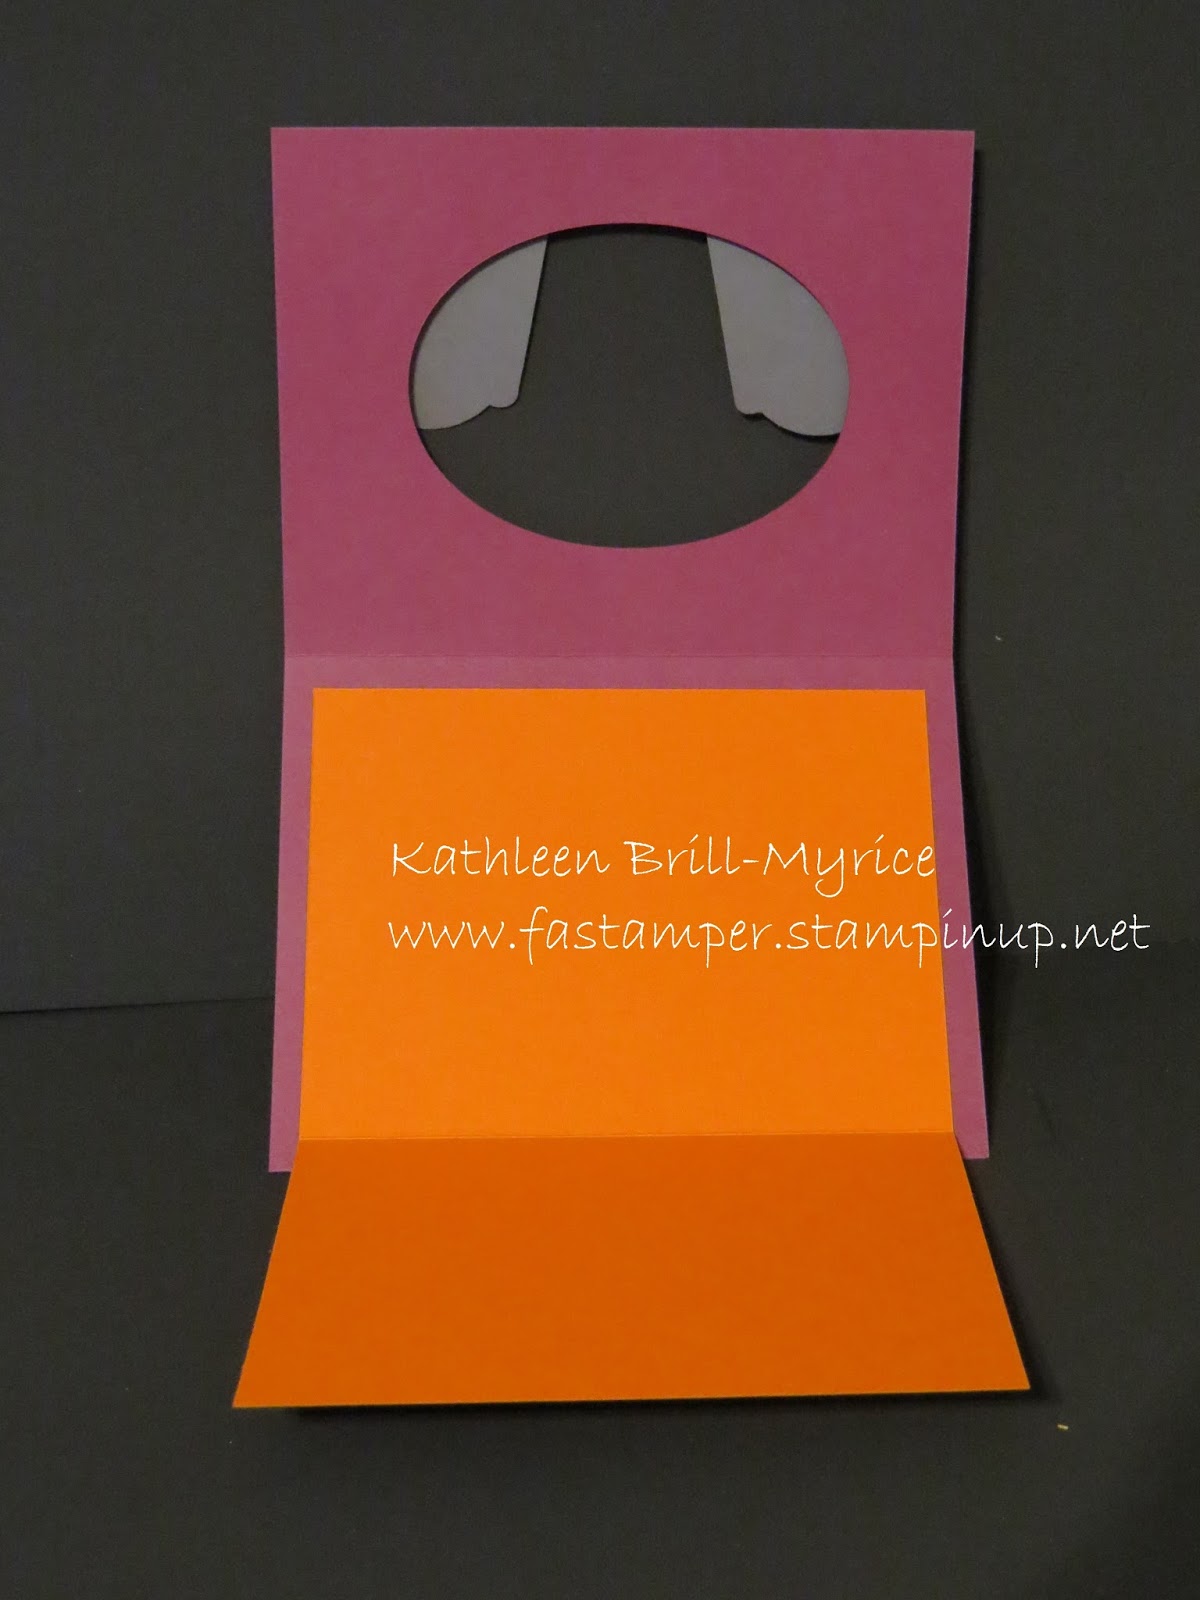
When you open the card the Happy Halloween tombstone is layered on another print from the Happy Haunting DSP.  But where do you write your message without it showing through the oval?


Well you make it open one more time of course.  The Tangerine Tango panel fold open to reveal a large space for a message.

I hope you have been enjoying my Sweet Haunting projects.  I will be back on Friday with more as part of the Stampin' Addicts Holiday Catalog --Fall Blog Hop.  Many talented stampers will be sharing their creations with Fall/Halloween themed products from the Holiday catalog that comes out next week.

PRODUCTS USED:
Built for Free Using: My Stampin Blog


My Demonstrator Website

Tuesday, August 11, 2015

"Thank You" workshop cards

As I mentioned last week, I had the pleasure of doing a workshop for a long time friend of mine.  She is a consultant for Tastefully Simple and asked me to make thank you cards with her team.

We made 5 cards.  I used a past Paper Pumpkin Kit for the first card.  Remember as a subscriber you can order past kits.  The second card was a pinwheel card.  Here is the original one I posted a couple months back.  This time we made the card using the Everyday Chic Designer Series Paper (#138445).

The third card was a twist on a previous card I shared in June.  The original card had stamped images from the Bohemian Borders stamp set.  This time we used the Bohemian Designer Washi Tape (#138386).

Check back tomorrow for the other two cards we made.

PRODUCTS USED:
Built for Free Using: My Stampin Blog


My Demonstrator Website

Friday, June 26, 2015

Layered Letters--Last Day

I hope you have enjoyed this week with the stamp set Layered Letters.  It truly is a wonderful alphabet set.  I have one last project to show you.  The inspiration for this came from the Baby card I showed you yesterday.  I like to keep various cards on hand for a last minute need.  Baby cards are tough though.  I never know which gender I might need, so I end up making them neutral colors.  It has also been 6 years since I was on the receiving side of the baby card.  Things have sure changed in that short time and now, gender reveal announcements are all over the place.  I live far from my family, how cool would it have been to announce the gender with a card.


The Layered Letters Stamp Set has several additional symbols.  I used the # sign the other day.  How perfect is the ? sign for this project!  I used my Stampin' Write marker to draw in the apostrophe.  Then of course we have the REVEAL!  (And so my blog reading family and friends know--I am NOT having another baby!)


How much do you love that cute print used inside the explosion box?  It is from the Go Wild Designer Series Paper Stack.  And the ribbon?  I loved the Stitched Satin Ribbon in the last catalog.  I was so glad to see them get 5 fresh colors for it this catalog.  

PRODUCTS USED:
 
Built for Free Using: My Stampin Blog

My Demonstrator Website

Monday, June 22, 2015

Layered Letters Week--Day 1

I shared the Layered Letters Stamp Set with you during the sneak peek weeks.  If you missed my first post with this stamp set you can see it HERE.  I enjoyed that project so much, I thought I would share a weeks worth of projects using the stamp set.  With yesterday being Father's Day, what better way is there to start the week than with a card for DAD.


This card came together in less than 15 minutes.  It is also perfect for having a little craft time with the kids.  The # symbol on the second layer comes in the stamp set.  What a great way to make your own background.  I embossed the top layer and added a simple ribbon tie.  No bows on the DAD card.  The fun part about this card is the way it opens. 

The two panels fold open to reveal a place for your message.  The card base is only 5-1/2" x 4-1/4".  The middle layer is 8-1/2" x 3-1/2" (scored at 4-1/4").  The top layer is 8-1/2" x 2-3/4" (scored at 4-1/4").  The Whisper White insert is 3-1/4" x 2-1/2".

PRODUCTS USED:
Built for Free Using: My Stampin Blog


My Demonstrator Website