Friday, February 10, 2012

Valentine Class Project #2 of 4

First can I mention how much I totally love the Matchbox Die.  It makes projects so simple and fast to do.  Last week I showed you one matchbox die project for a friend.  I decided to change it just a little bit and do one with my ladies for the Valentine Class last Monday.  Like yesterday's, this project is done in Rose Red and So Saffron.

The tag on top features the NEW Framelits and the Apothecary Art Stamp Set.  I love the new framelits.  Thin and easy to store, nesting shapes so you can mat things easily, and they have so many uses.  Today they are used the most common way, cut out an image with a coordinating shape.  I stamped the image twice onto Whisper White cardstock.  Once in the Rose Red and again in So Saffron.  The first I put through the Big Shot with the Framelit.  The second one I used a marker to color the words in Rose Red before stamping.  I then punched out the center with a 1" circle punch and attached it with a dimensional.
The nuggets inside the box are wrapped with So Saffron cardstock and then with images from the It's A Wrap Holiday.  The It's A Wrap Holiday Stamp Set was in the Holiday Mini.  It is not available as a stamp set at this time, but you can purchase the Digital Download.  Don't have My Digital Studio is available as a FREE download.  Try it out for 30 days.  I know you will love it.  The bow is made using the folk tying method and attached with a mini glue dot.  What is the "fork tying method"?  You will have to come back tomorrow to find out.

ORDER ONLINE 24/7 at My Demonstrator Website.  Order $50 in Product (before tax and shipping) and receive a Sale-A-Bration item for FREE! and a Frequent Stamper Miles Token from me.

Products Used:  
Stamps:  Apothecary Art (wm#125525, cm#125527), It's A Wrap Holidays (Digital Download #127613)
Colors: So Saffrom, Rose Red, Whisper White
Accessories: Labels Collection Framilts (#125598), 1" Circle Punch (#119868), White Taffeta Ribbon (#109070), Dimensional (#104430), Matchbox Die (#114890), Big Shot (#113439), Mini Glue Dots (#103683)


Thursday, February 9, 2012

Valentine's Class Project #1 of 4

Last Monday night I had my Valentine Class.  We made 4 projects, I have the first for you today.  Inspiration came from the cutest little candy holder swap I received at Leadership last month.  This is my version.  It features the Top Note Die and the Teeny Tiny Wishes stamp set.  You could make these in any color for any reason.  I chose to make it in Rose Red and So Saffron.

I started with a piece of 4-1/4" x 11" cardstock scored in half at 5-1/2".  I put the folded cardstock onto my Top Note Die with the end just before the curvy details so I wouldn't cut the end off.  I then scored 1/4" from each side of the fold and again from point to point across one Top Note.  With the excess cardstock from cutting the shape I cut a 1"x 4-1/4" piece and scored at 1/4", 3/4", 3-1/2" & 4".  I put sticky strip on each end of the 1" strip and again just inside the 3/4" and 3-1/2" score lines.  This piece was adhered inside the front area to make a pocket for the candy.
I decorated the front with a scrap of Designer Series Paper (this pattern is retired, but there are others just as wonderful in the Designer Paper Patterns Stacks), some taffeta ribbon and a simple tag punched with the word window and modern label punch.  The "LOVE" stamped at the top is from the FREE Sale-A-Bration Stamp Set Outlined Occasions.

Be sure to check back in the coming days for the other projects made at the Valentine's Class.

ORDER ONLINE 24/7 at My Demonstrator Website.  Order $50 in Product (before tax and shipping) and receive a Sale-A-Bration item for FREE! and a Frequent Stamper Miles Token from me. 

Wednesday, February 8, 2012

Cupcake Valentine

This could easily be a Birthday card, but was created as a Valentine Card.  A friend of mine loves cupcakes.  The layout is a classic one for any 2x2 sized image.

To put a little more focus on the cupcake I matted it onto a small piece of chocolate chip set into the embossed Designer Frame.  The frame comes as a set of two, the other one being an oval.  The base of the cupcake was stamped with the Create A Cupcake stamp set before being punched with the coordinating punch.  The top and cherry is punched straight from the colored cardstock, though there are corresponding images in the stamp set.  If you have not tried the Baker's Twine, you should add some to your next order.  For only $2.95 you get 25 yards of twine.  It comes in 8 great colors including all of the 2011-2013 In Colors.  I used the Cherry Cobbler for this card.  The word Love! is part of a saying in the Loads of Love stamp set.
Valentine's Day is a week away.  Make one for your special friend today.

Products Used:  
Stamps: Create A Cupcake (wm#121915, cm#121982), Loads of Love (wm#115022)
Colors: Pink Pirouette, Cherry Cobbler, Confetti White
Accessories: Perfect Polka Dots Embossing Folder (#117335), Cherry Cobbler Baker's Twine (#123125), Cupcake Punch (#121807), Word Window Punch (#119857), Modern Label Punch (#119849), Big Shot (#113439), Set Designer Frames (#123130), Dimensionals (#104430)


Tuesday, February 7, 2012

Bird Punch Artwork

One of my club members and friend, Carol, brought these to my workshop the other day.  She works for the Wildlife Refuge in Comanche County.  She made all of these using the Two Step Bird Punch.  She punched the pieces from various colors of cardstock scraps and then added highlights and details with markers.  I don't know the names of all the types of birds, but they are done to be somewhat realistic in nature.
She did such a fabulous job, I had to show all of you.  Please leave a comment for Carol here and I will be sure to pass them on. 


Monday, February 6, 2012

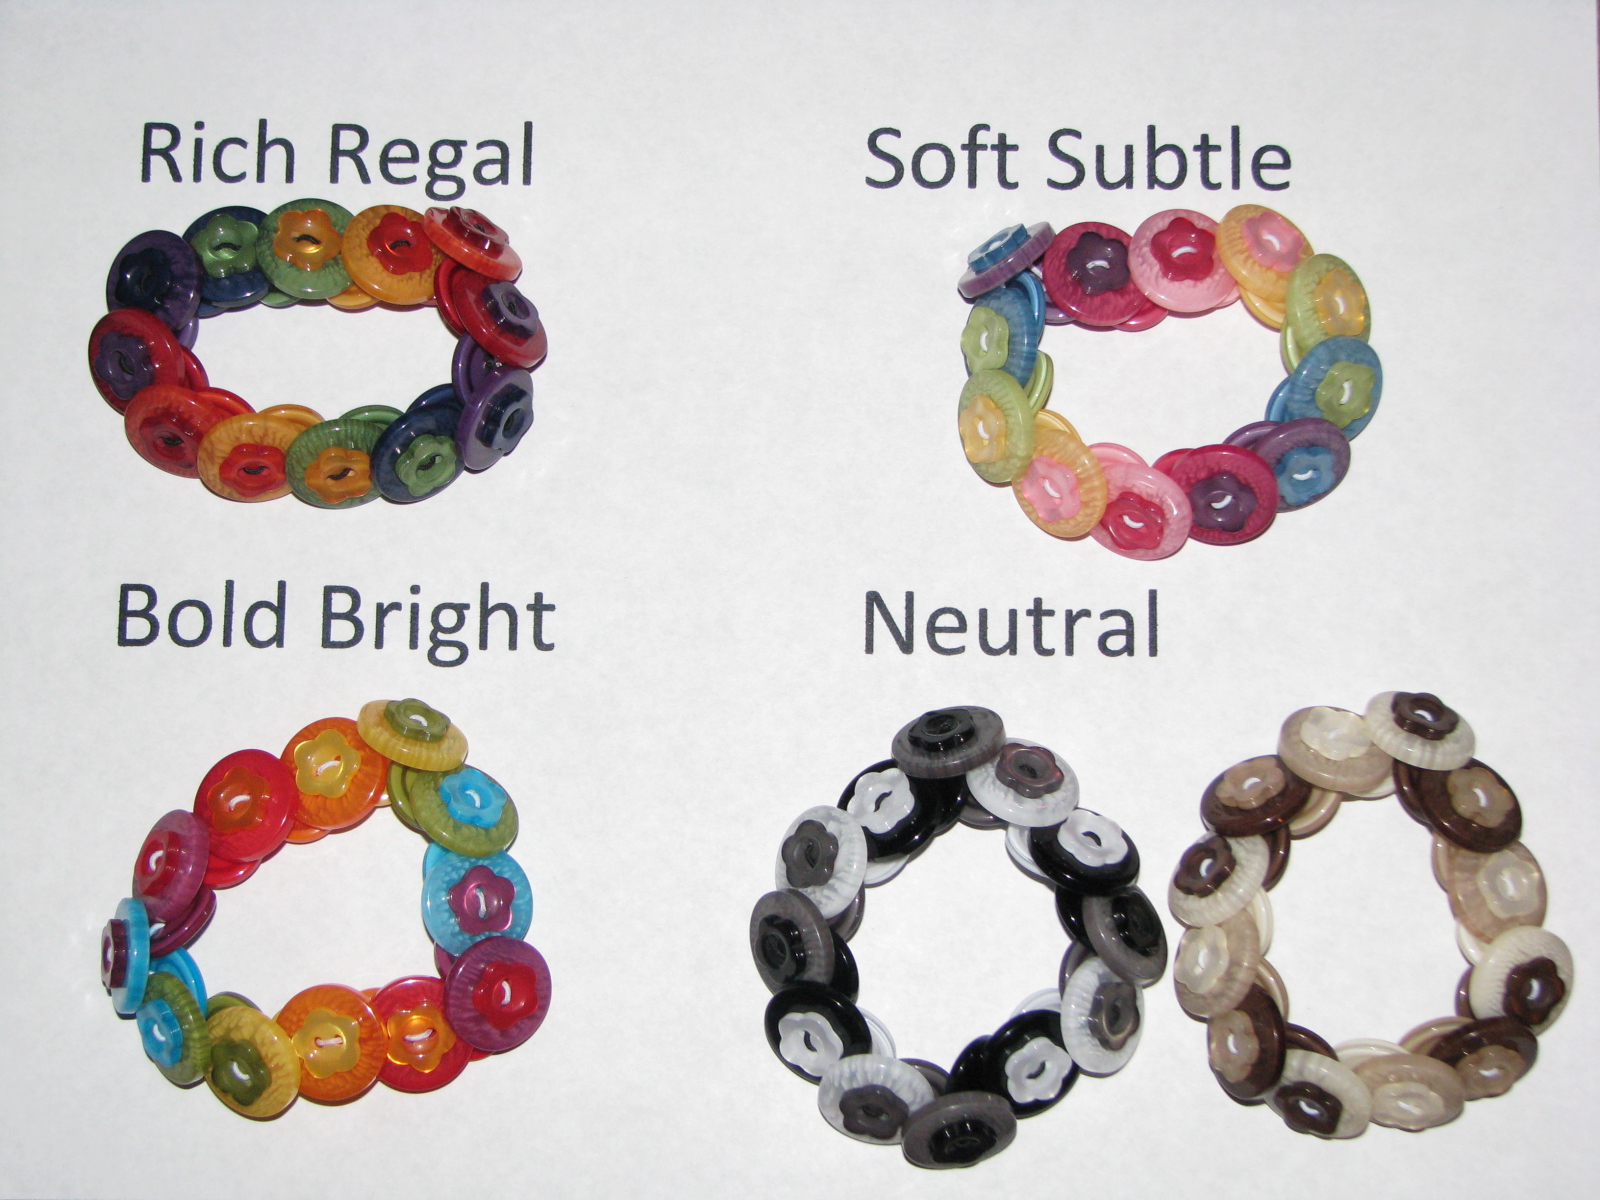
Double Class--Punch A Bunch & Button Bracelet

On February 20th I am having a Double Class Night.  You can come to both or just one.  Registration is pretty simple.  Purchase the featured product for the class before February 10th (so you have the item in time) and then just show up.    

PUNCH A BUNCH- starts at 6:30pm -Featured Product: Any $15.95 (or higher) punch.  I am cleaning out my scraps.  I want to lighten my paper load for the upcoming move.  I have put ALL of my scraps into a LARGE box.  Bring your new punch and punch till the scraps are gone or your hand can't take anymore.  I will also have my punches available so you can go home with a bag of different shapes.

BUTTON BRACELET- starts at 7:15pm- Featured Product: $8.95 Designer Button Collection (#119747 Brights), (#119743 Neutral), (#119744 Regal), (#119745 Subtles).  Each pack of buttons makes TWO bracelets.  All other materials and instructions will be supplied at the class.  Bring your new buttons to class. 
.
.
Featured Product must be purchased from me to come to class for FREE!  Contact me to for fee to attend classes.

ORDER ONLINE 24/7 at My Demonstrator Website.  Order $50 in Product (before tax and shipping) and receive a Sale-A-Bration item for FREE! and a Frequent Stamper Miles Token from me. 


Sunday, February 5, 2012

Fun Flowers Bag Tag

Along with the Matchbox Candy Gifts from yesterday's post, my friend ask me to make her something for her downline going to the regional event.  In the past I have made her entire group calendars, cards, and candy treats.  This time I wanted something more personal they could use everyday.  Also something that would show they were a part of the group they were with.

Keeping it simple for her event, I made my friend's regional event group a tag they could put on their bag of goodies they get from the company.  Later they can hang it on their purse as a conversation starter.  Each tag has two double sided flowers made of chipboard cut with the Fun Flowers Big Shot Die.  The chipboard was first covered with Designer Series Paper from the Soft Subtles Paper Patterns Stack.  I adhered the DSP to the chipboard with a Glue Stick.
After running it through the big shot, I punched a hole in the top with the Crop-A-Dile.  The labels on each side were printed onto Whisper White cardstock using my computer.  They have information like, the location of the event, the company event theme and the name of my friends downline group.  The Pretty In Pink letters are the first initial of the ladies names and were cut with the Timeless Type Jr. Alphabet.  I attached them with a two way glue pen.  The ribbon is from the 1/2" Scalloped Dots Ribbon Series.
With my families upcoming move for the army to Hawaii, I think I am going to make similar tags to help locate our luggage faster at the airport.


Products Used:  Soft Subtles Paper Patterns Stacks (#117152), Glue Stick (#104045), Fun Flowers Die (#121812), Crop-A-Dile (#108362), 1-3/4" Circle Punch (#119850), Timeless Type Alphabet (#115951), Two Way Glue Pen (#100425), Pretty in Pink Scalloped Dots Ribbon (#124141), Big Shot (#113439)


ORDER ONLINE 24/7 at My Demonstrator Website.  Order $50 in Product (before tax and shipping) and receive a Sale-A-Bration item for FREE! and a Frequent Stamper Miles Token from me.


Fun Flowers Die (#121812)

1/2" Scalloped Dots Ribbon (Shown in Pretty in Pink #124141)

Saturday, February 4, 2012

Mixed Bunch Matchbox Die

A friend of mine is a consultant for another direct sales company.  This weekend she is getting together with other consultants for a regional event.  She knows several of the trainers for the event and asked if I would make them a simple thank you.  This is what I came up with.

The box the candy is in is from the Matchbox Die.  This Big Shot die will cut the box, the sleeve, and three different tag labels.  I just used the box.  It will cut the shape and fold lines making assembly easy to do.  I stamped one of the small images from the Mixed Bunch stamp set and then hand wrapped the sleeve around the box, holding it shut with some Sticky Strip.  The flower is stamped from the Mixed Bunch stamp set and punched with the coordinating Blossom Punch.  The center of the flower is a Bold Bright 3/16" Brad.  I wrote the trainers name in Tempting Turquoise marker onto the Modern Label tag.
Inside the box are 4 pieces of chocolate nuggets.  Each has been wrapped with a strip of Old Olive cardstock. I stamper the label for the chocolate twice.  Once in Temping Turquoise and again in Melon Mambo.  I cut out the Melon Mambo center and adhered it with some snail over the Tempting Turquoise one.
NOTE:  You can stamp the wrap imaged onto mailing labels, but do not attach them to the pieces of chocolate directly.  The glue for the label is not safe to put on the chocolate.  It can soak through the chocolate wrapper.  Be sure to attach the label to a piece of cardstock first.  I also found that the ink does not stamp clearly on the mailing labels and looks a bit fuzzy.

Products Used from the Occasions Mini Catalog (ends April 30, 2012)
Mixed Bunch Stamp Set (wm #125535, cm #125537), Blossom Punch (#125603)
 Other Products Used:  It's A Wrap Stamp Set (wm #123590, cm #123592), Matchbox Die (#114890), Big Shot (#113439), Bold Bright 3/16" Brads (#119740), Modern Label Punch (#119849), Sticky Strip (#104294), 3/4" Circle Punch (#119873)
Colors for Cardstock, Ink & Markers: Melon Mambo, Tempting Turquoise, Old Olive, Whisper White

ORDER ONLINE 24/7 at My Demonstrator Website.  Order $50 in Product (before tax and shipping) and receive a Sale-A-Bration item for FREE! and a Frequent Stamper Miles Token from me.