Showing posts with label Halloween. Show all posts

Friday, August 28, 2015

Stampin' Addicts 2015 Holiday Catalog Fall Blog Hop

Hello hoppers!  Most of you just came from Tanya's Blog.  Wasn't that a cute stamp set?  So much fun and so many uses.  If you came here directly, don't worry, just follow the links on the hop and it will loop you all the way around back to here.  We love to hear from you about our hops and projects.  You can leave a comment on any of the stops or leave a comment on the discussion thread at Stampin' Addicts.

I am featuring the Sweet Hauntings Stamp Set (#139705) from page 47 of the 2015 Holiday Catalog.  I have had so much fun showing this stamp set on my blog last week and have 3 more projects just for this hop.  There are so many uses for this stamp set.  There are 3 images that fit the Note Tag Punch (#135860), 4 different potion bottles, and 2 sayings that tie everything together.  My family LOVES Halloween.  We enjoy having our friends (of ALL ages) over for a night of spooky food and fun.


First I have a great party invitation for you.  I stamped all of the potion bottles on the front of my card, then colored them in with various Stampin' Write Markers.  TIP:  I used my grid paper to line up all the stamps, then put them on one block so they will be straight when I stamp them.  Under the bottles is a piece of the bat print washi tape from the Happy Haunting Designer Washi Tape (#139608).  I stamped one of the sayings from the stamp set in Cucumber Crush on the bottom.  A few quick tid bits to decorate the upper corner, my party information on the inside and I am ready to invite my guests.

I love to have cute little treats for my kids to take to school.  This is the medium size treat bag from the Gift Bag Punch Board (#135862).  NOTE: The size of the bag refers to the size of the bottom of the bag.  You can make the bag as tall or as short as you like to fit your treats.  Again I stamped several of the bottles at once on the bag, then put another print from the Washi Tape around the bag.  I made a simple topper for the bag.  I folded a piece of Tangerine Tango cardstock in half and attached a Spider Web Doily (#139622) with a glue stick.  I wrapped the extra edges of the doily around the cardstock.  This is the other sentiment from the stamp set, stamped in Rich Razzleberry to match the bag.  The back of the topper is attached to the bag and I used a small bit of velcro to hold the front closed.  


For my party guests I have a treat basket.  I used my markers to color certain parts of the Note Tag shaped stamps.  They make cute tombstone images.  The center one was stamped again on cardstock and cut out to raise it up on dimensionals.  The basket was made with the Berry Basket Die (#137366) from the Annual Catalog.  I tied a piece of Rich Razzleberry Cotton Ribbon (#134564) around the top of the basket.  You can see a piece of Rich Razzleberry cardstock peaking through the slits near the bottom.  I took a 5-1/2" square piece of cardstock, scored it on all four sides at 1-1/4", folded on the score lines, made a few quick slits to shape it into an open box.  I punched a circle in the center of the insert to hold a cupcake.  
I know a picture would be great, but there was an "accident" with the cupcake.  You could of course fill the basket with a bag filled with candy or other treats.  

I hope you enjoyed my projects with the Sweet Haunting Stamp Set.  If you did, please leave me a message below before going to the next stop on the hop.  The next stop is Carmen with some Hall-O-Ween Treats.



My Demonstrator Website

Monday, August 24, 2015

Haunting Fun Fold card

I have a fun card for you today.  The Sweet Haunting Stamp Set has 3 images that resemble tombstones.  So of course I had to make a little graveyard card.


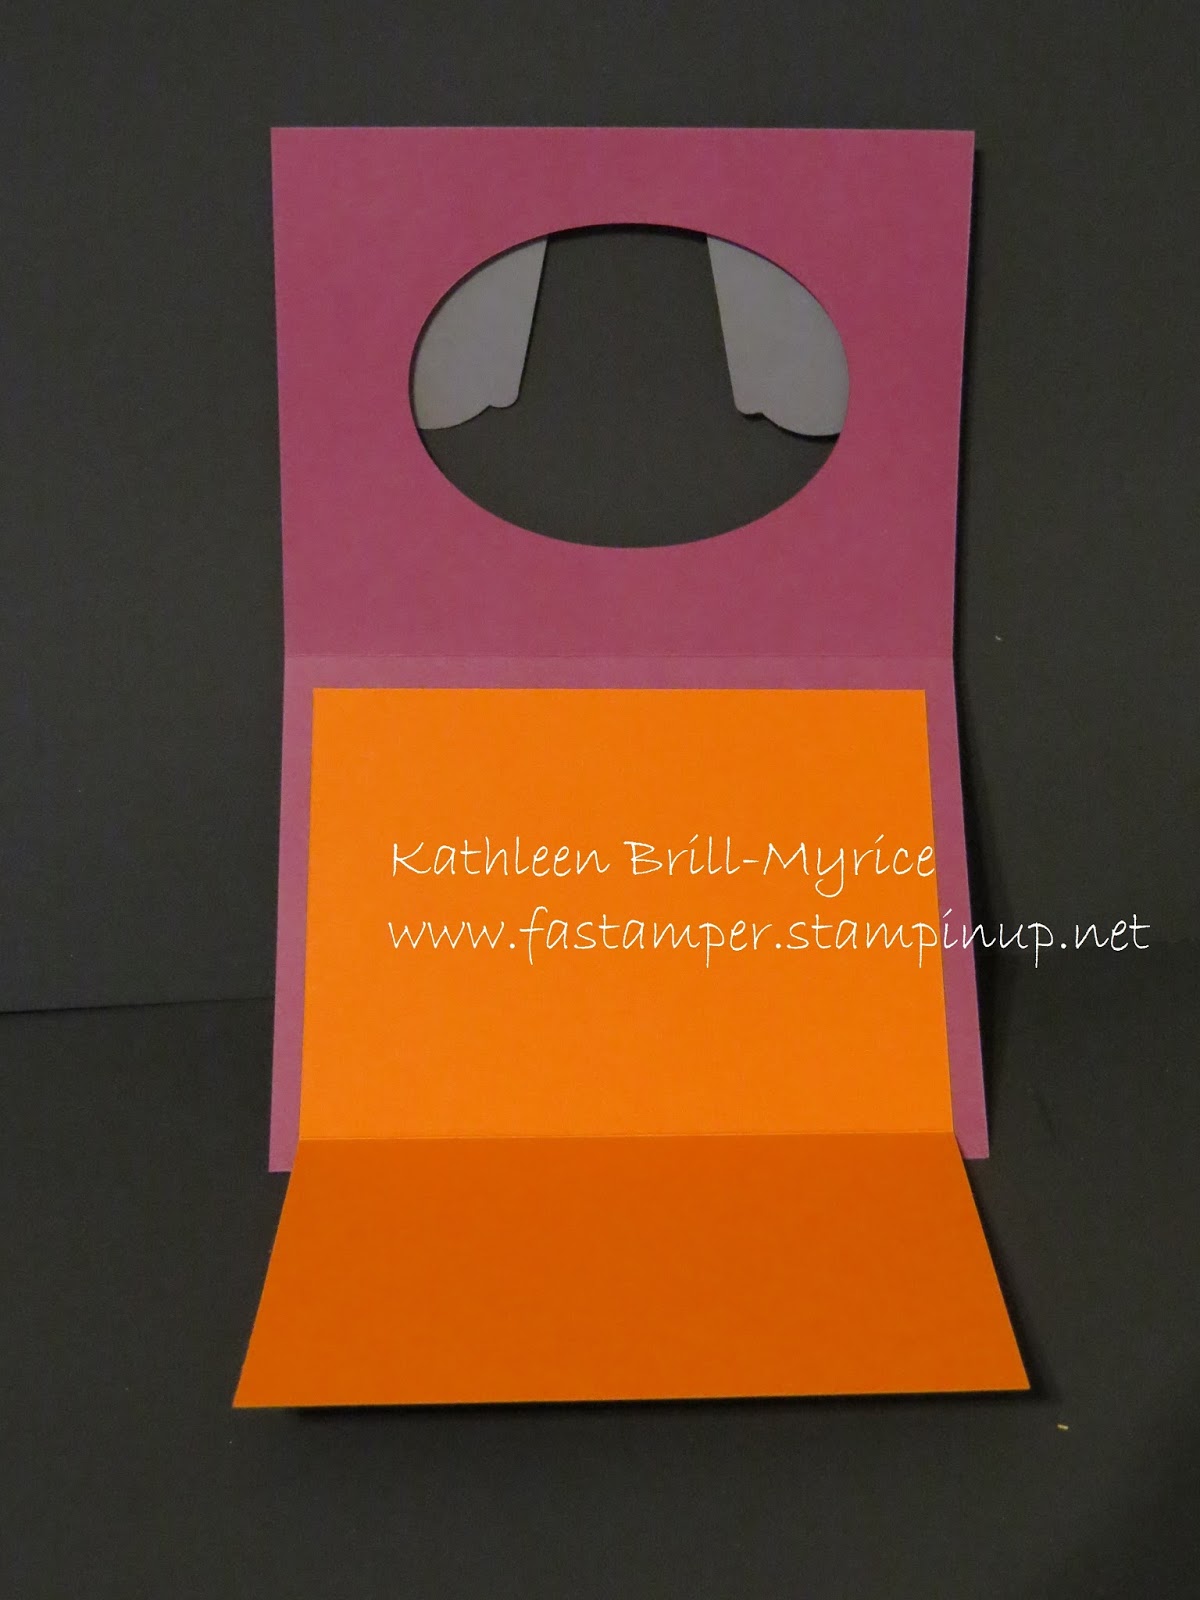
Again, I used a marker to ink just the area I wanted.  Then I wrote in the space.  I first cut the oval in the Designer Series Paper.  I attached it to the card front and cut the oval from the Rich Razzleberry cardstock.  I have another bat made with the Sweetheart punch.  

When you open the card the Happy Halloween tombstone is layered on another print from the Happy Haunting DSP.  But where do you write your message without it showing through the oval?


Well you make it open one more time of course.  The Tangerine Tango panel fold open to reveal a large space for a message.


I hope you have been enjoying my Sweet Haunting projects.  I will be back on Friday with more as part of the Stampin' Addicts Holiday Catalog --Fall Blog Hop.  Many talented stampers will be sharing their creations with Fall/Halloween themed products from the Holiday catalog that comes out next week.

PRODUCTS USED:
Built for Free Using: My Stampin Blog


My Demonstrator Website

Friday, August 21, 2015

Quick Haunting Favor Boxes

I wanted to show up a few more of the prints in the Happy Haunting Designer Series Paper.  What better way than with a quick project.


I made these boxes with the Gift Box Punch Board.  I used a 6x6 piece of cardstock to make a 1.75" box.  They are simply tied shut with a piece of ribbon.  I made the tags with the Sweet Haunting Stamp Set.  By using markers to color the stamp I was able to use just the decorative border on the stamp.  This let me write my own tombstone names on the tag.  Simple and fast for personalized classroom or party favors.

Thank you for joining me this week for a sneak peek at some Halloween themed products coming soon in the Holiday Catalog.

PRODUCTS USED:
Built for Free Using: My Stampin Blog


My Demonstrator Website

Thursday, August 20, 2015

Boo Card

Many times when making a project I make some of the parts more than once.  For yesterday's doorknob banner I made the "BOO" pumpkins a couple times.  I didn't want the other one to go to waste, so I looked around on my desk for more things to use.  I found a Rich Razzleberry oval (from a project I have yet to share) and the following card was born.


I am in love with the Happy Haunting DSP (#139584).  The prints are so much fun.  The bat was made with the Sweetheart Punch (#133786).  I punched out a heart then moved the punch up to cut out just the top part to look like wings.  The grass at the bottom is done with the Fringe Scissors (#133325).  This would make a great card for your child's teacher or grandchildren who live far away.
PRODUCTS USED:
Built for Free Using: My Stampin Blog


My Demonstrator Website

Wednesday, August 19, 2015

BOO Banner

I know it is only August, but I am on a major Halloween kick.  I can't wait for real fall weather to get here, go pick some pumpkins and put up my outdoor decorations.  I was looking at the Spider Web Doilies I have used the last two days and thought about how to use them on a banner.  I decided not to go with a long spelled out banner, but more of a door knob hanger.  This would go along great with the "You've Been Boo'd" neighbor treats.


Stampin' Up! reconfigured the Build-A-Banner Kit this year.  I really like the new shapes to the banner pieces and they have added some templates to sponge decorative edges on them.  Here is the scalloped edge banner with the dotted template.  I used a Sponge Dauber to apply the Rich Razleberry ink to the banner piece.  The "BOO" is done with the Layered Letters Stamp Set.  I used a Stampin' Write Marker to draw on the pumpkin stems before cutting out the piece with my scissors.  I attached the doily and "BOO" to the banner with some Multi-purpose Glue.

PRODUCTS USED:
Built for Free Using: My Stampin Blog


My Demonstrator Website

Tuesday, August 18, 2015

Candy Bar Halloween Treat

I have another project today with the Sweet Haunting Stamp Set.  Just like the title of the stamp set, this project is sweet.  One of the Note Tag Punch shaped stamps in the set says "DEATH BY CHOCOLATE", so of course we need a chocolate treat.  How about a full size Hershey bar?  I can think of lots of people who would want one of these everyday.


I first wrapped the chocolate bar with another piece (5-1/2" x 5-1/2") from the Happy Haunting Designer Series Paper.  The new Tear and Tape adhesive is wonderful for holding bent papers closed.  This is the other half of the Spider Web Doily from yesterday's project.  I then layered a 1/2" strip of Rich Razzleberry on the bottom and put a couple pieces behind the Tangerine Tango tag piece.  (Exciting New Product Coming--The black ink is a new Archival Black Ink Pad.  Stamps a true black color for those who have been getting a purple tint from our standard Basic Black Classic Ink Pad).  There is a long piece of Black Stitched Satin Ribbon that loops around the candy bar to pull it out of the sleeve.   


Here is the set of projects together.  I love how you can cut the Spider Web Doilies into two pieces to get even more projects and still have a good size impact on your project.  I forgot to mention you get 24 of those doilies in a pack for only $4.50.  What a deal for making a classroom full of treats.  Cut them in half and get two classes of treats for your kids.

PRODUCTS USED:
Built for Free Using: My Stampin Blog


My Demonstrator Website

Monday, August 17, 2015

Sweet Hauntings

We don't normally start to think about Halloween too much in August, but it is fast approaching.  As always, Stampin' Up! is here to help.  September 1, 2015 is the start of the new Holiday Catalog and there are LOTS of new things just for the fall season.  So how about a sneak peek?

Sweet Hauntings is a new 9 piece stamp set coming out.  There are 3 images that fit the Note Tag Punch, 2 sayings and 4 bottles of spooky brews.  It is the ultimate set for your quick party treats.  The tag punch images can be punched out and then attached to any box or bag filled with goodies.  Add in the Happy Haunting Designer Series Paper, Washi Tape, and Spider Web Doilies and you have endless possibilities.


Today I have a simple card using one of the Note Tag images.  The patterns in the DSP are too cute.  I just love the little crows atop of the tombstones and the little jack-o-lantern faces are too cute hiding in the print.  I cut a Spider Web Doily in half and glued it on with a glue stick.  I used a Basic Black, Rich Razzleberry and Tangerine Tango marker to ink the stamp.  I punched it out and trimmed it close to the lines, so it could be layered on the shape punched from Rich Razzleberry. The Razzleberry strip across the card is one of the Washi Tape patterns.

This card would be great for a party invitation or to accompany a gift for a co-worker or neighbor.  Be sure to check back all week for more ideas for your Halloween projects.

PRODUCTS USED:
Built for Free Using: My Stampin Blog


My Demonstrator Website

Monday, August 26, 2013

UPCOMING BANNER CLASSES

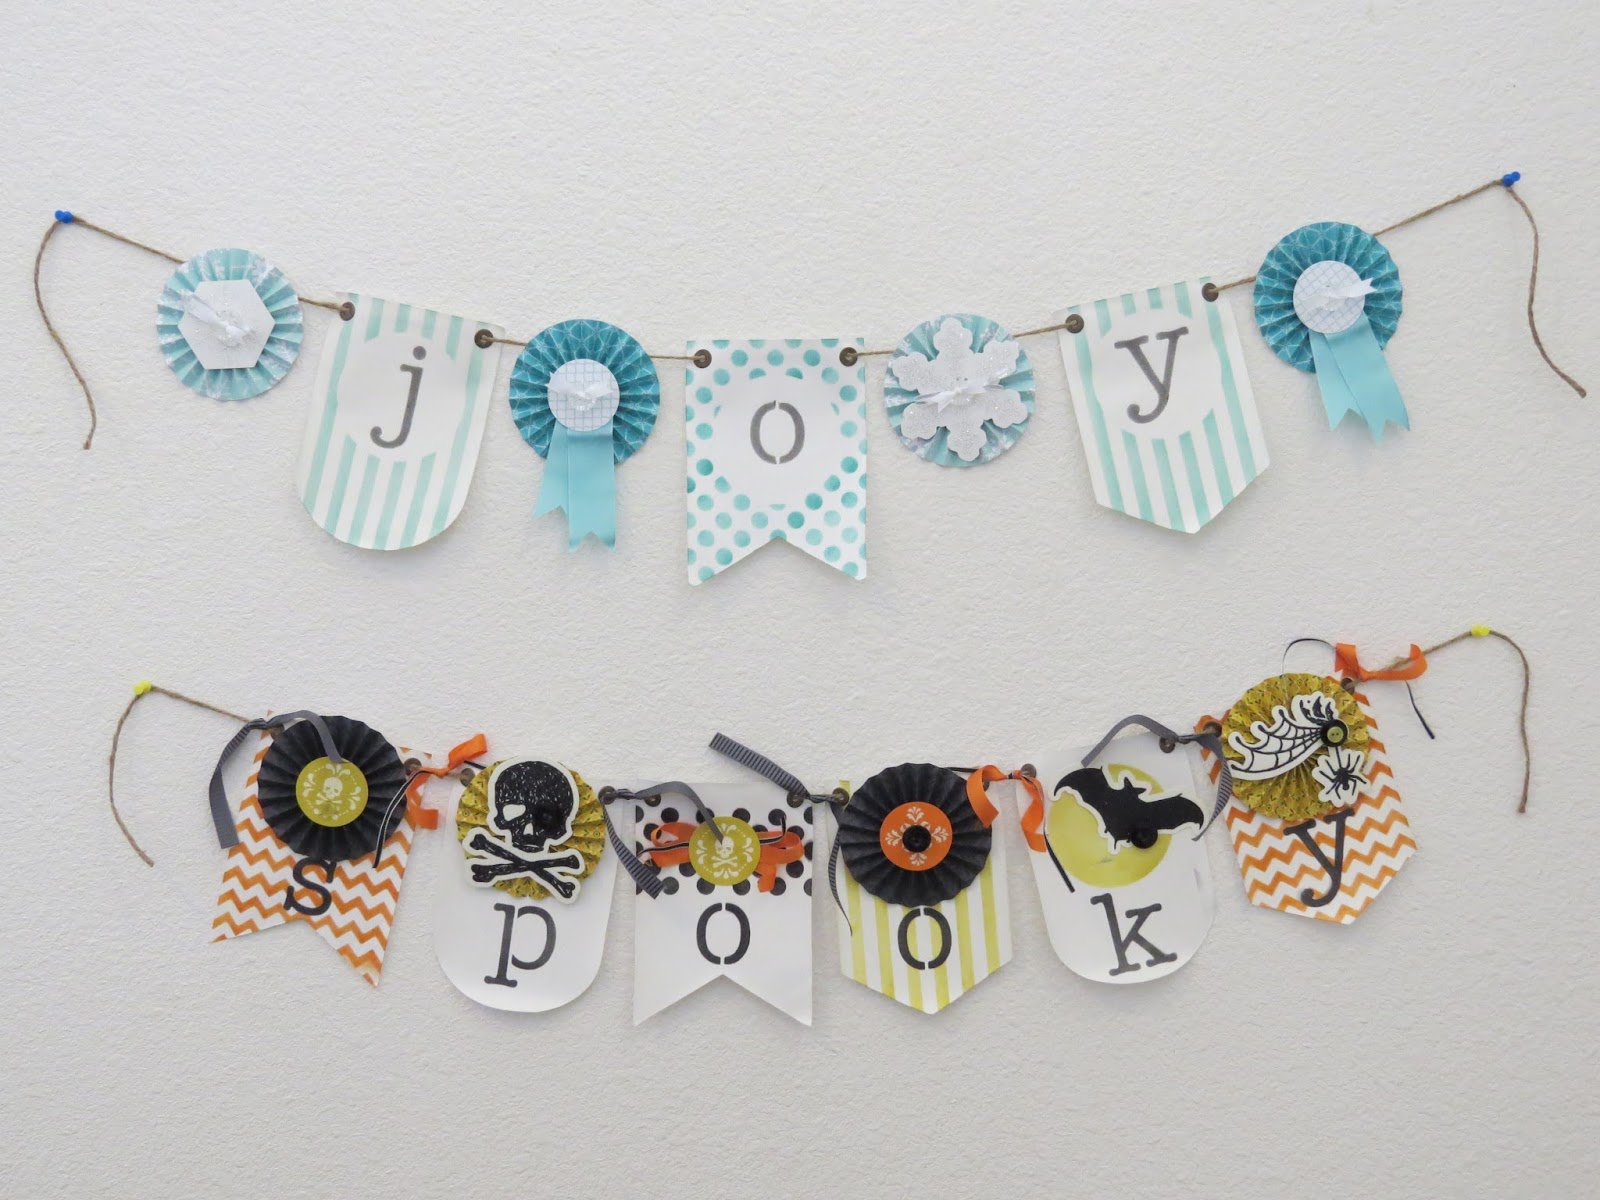
Have you seen the Build-A-Banner products in the Holiday Catalog.  How totally cute are these?  I could not resist and got all of the items, then sat down over the weekend and made 3 banners.  One each for Halloween, Thanksgiving, and Christmas.  I had so much fun making mine, that I thought it would be great to have a class for everyone to make their own.

Each banner is Approximately 3 Feet long.  Each flag measures 5" by 7".
December 7th--"Joy" Banner
October 5th--"Spooky" Banner
November 2nd-- "Thanks" Banner
"Give" additional $5 
WHEN:  These classes will be held as a 3 part series on the first Saturday of each month (Oct-Dec) @ 1:00pm.  Please give approximately 2 hours to assemble your banner at the class.  Some people may work faster, others slower, and some supplies need to be shared.  You can sign up for one, two or all three classes. 

WHERE:  All classes are held in my home on AMR.  Classes will be limited to 8 participants at each class. 

COST:  Each class is $25* (see November class note below) with payment due 10 days before the class date.  Prepay for all three classes by September 25th for only $70 and receive the “give” banner tier for free.

*November class is for the “thanks” tier.  You can add the “give” tier for an additional $5 or receive it for free with prepayment for all three classes by September 25th.


THINGS TO BRING:  Absolutely nothing.  All supplies will be provided at the class. 

HOW TO REGISTER:  You can email me at fa_stamper@sbcglobal.net, call me at (580)483-3758 or leave me a message on my business FACEBOOK page.  Search for Kathleen Brill-Myrice Demonstrator.  I will then contact you for your payment.  Your registration cannot be confirmed until payment is received. 


PRIVATE CLASSES for these banners are available.  Contact me for available dates.  Private classes must have a minimum of 6 people and must be prepaid in full 10 days before class date. 

My Demonstrator Website

Friday, August 9, 2013

Stampin' Addicts Fall Blog Hop

Welcome to stop #7 on this hop.  If you have been following the Hop you just came from Rhonda's Blog.  Isn't she great!  She is a great stamper and I am so blessed to call her my friend too.  If you started here, you can stay here and follow the Hop until it loops its way back around.  If you want to start at the beginning please go to Heidi's Blog.

If you have never seen a Blog Hop before you are in for a treat.  11 Demonstrators from Stampin' Addicts have brought you projects featuring the Fall Products from the 2013 Stampin' Up! Holiday Catalog.  I have 4 projects featuring the Halloween Bash Stamp Set, so lets get started.

What is the first thing we do when having a BASH?  We send out invitations.  I colored the image with my Stampin' Write Markers in Basic Gray, Basic Black and Pumpkin Pie.  The torn edges were colored with the NEW Smokey Slate Marker.  It is hard to see in the photo, but the black background area has a fuzzy texture to it.  Come back next week for tips on how to do that.  The little creepy crawly fellow is from my Halloween decorations.  A cheap embellishment this time of year.  And how about that envelope?  The NEW Envelope Liners Framelit Dies can make any envelope just jump out at you.

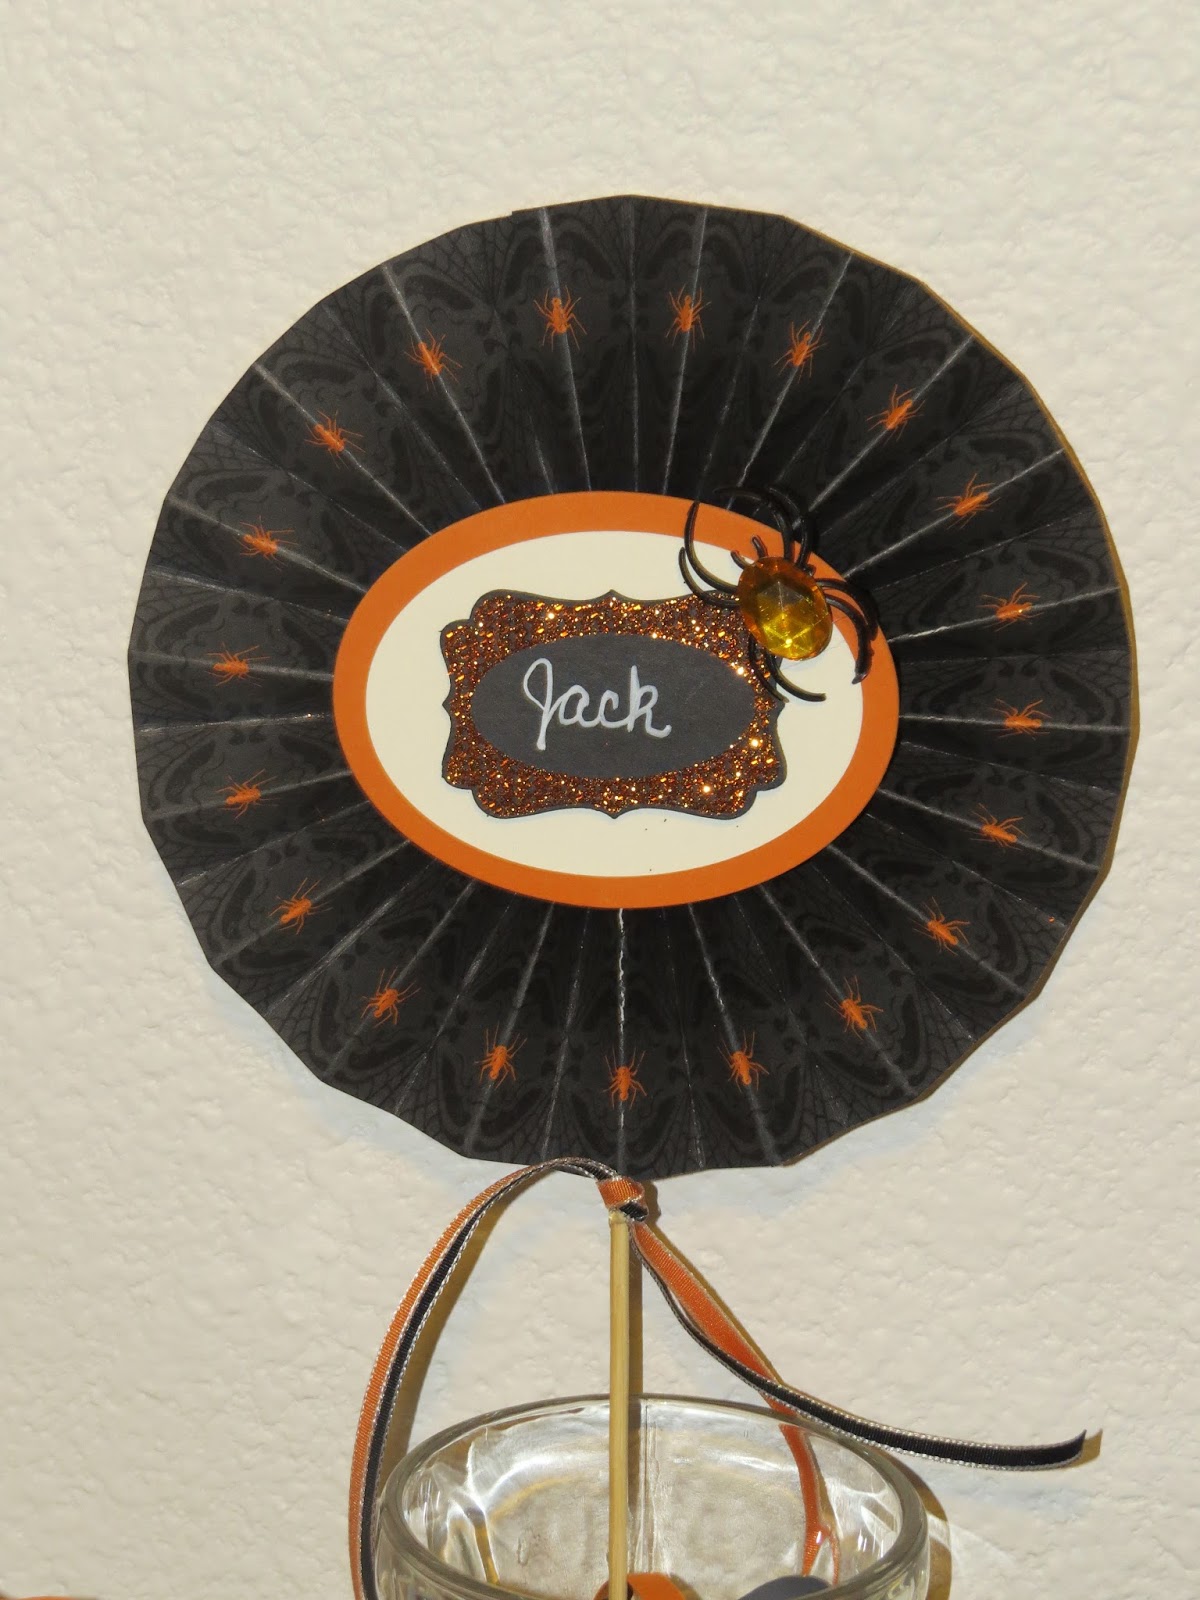
We want everyone to find their place at the party.  Here is a fun decor project.  I made the rosette using the Witches' Brew Designer Series Paper.  I lined up the paper in my Paper Cutter, so they spiders on the print were near the outer edge.  I then used my scoring tool to score the fold lines.  There is no perfect measurement to score this at.  I moved the DSP around so the groove of the tool was in the center of the spider or his web area.  I stamped the label in versamark ink, then used heat and stick powder to adhere the orange glitter.  The name is hand written with the NEW Chalk Marker.

Once everyone has found their seat you want to have a little treat for them.  The treat topper features the Label Framelits turned both directions.  Again, I colored the stamp with my Stampin' Write Markers.  Add a little something with a glitter covered background.  (More details on that next week).  For those looking for the worms, I found them in the Hawaiian treat section of my store.  They are Li Hing covered Sour Worms.  "Eat If You DARE!"

To round out our table setting, we have a simple little package for holding the silverware.  A little distress marks from the Gorgeous Grunge Stamp Set.  Be sure to check back next week for more photos and details on how to make these projects yourself.  But now, it is on to the next stop at Mary's Blog where she is going to show you some fabulous uses for the Witches' Brew Designer Series Paper and Washi Tape.

Thursday, August 8, 2013

Blog Hop Sneak Peak

It is one of my favorite times of the year.  BLOG HOP TIME with Stampin' Addicts.  This weekend me and many other fellow Stampin' Up! Demonstrators will be sharing Fall projects with products from the Holiday Mini Catalog.  I just got done with the last project I am showing on this hop.  What does your craft area look like after some fun stamping time?  Here is mine.

Oh you wanted a sneak peak of the projects?  Well?  ........OK!  Here is a glimpse of my projects.  I am featuring the Halloween Bash stamp set.

Be sure to come back on Friday for this fantastic Fall Blog Hop by the Stampin' Addicts.


My Demonstrator Website

Wednesday, October 31, 2012

Happy Halloween--Boo Wreath

Happy Halloween everyone.  I have been wanting to make one of these wreaths for sometime now.  I was able to sit down for 4 hours the other day and make this one.  Now that I have done one, I am sure the next won't take quite as long.  Most of my time was spent planning and getting my kids out of my craft space.

All of the rosettes were done with the Designer Rosette Die.  Though I didn't use the decorative edge area of the die, it made scoring all the fold lines much faster.  The larger of the rosettes were all made with solid colored pieces of cardstock cut at 2" x 11".  Each rosette used two strips of cardstock.  The smaller rosettes were made with two strips of 1-1/2" x 12" pieces of Howlstooth & Scaringbone Designer Series Paper from the Holiday Mini Catalog.

Here are a few close ups of the details on the rosettes.  I used a variety of accessories to decorate each rosette, including ribbons, glimmer brads, and buttons.  The "BOO" Banner was cut with a retired set of Big Shot Alphabet.  I chose this one as I wanted larger letters.  I have another wreath in the works that will use the current Big Shot Alphabet in the catalog.  I used the center  piece left from the "O" to make the eye.  I put a smaller black circle on top of the center and cut it down to be at the bottom of the eye area.  The Large Basic Pearl finishes off the detail.  The straw is Crumb Cake cut into thin strips and crumpled up.  There are also bits of Crumb Cake Tulle stuck under the edges of some rosettes.


The entire thing is held together with some two way glue pen and a whole lot of Hot Glue.  The new Silicone Mat makes this a much easier process.  I found the wreath form at the holiday sale area of a local big box retailer.  Think big red and white circles.


PRODUCTS USED: *Denotes Holiday Mini Catalog
Stamps: NONE
Colors: Basic Black, Basic Gray, More Mustard, Tangerine Tango, Very Vanilla, Crumb Cake, *Howlstooth & Scaringbone DSP (#126906).
Accessories:  *1/2" Striped Satin Ribbon (#127937), Linen Thread, 1/8" Taffeta Ribbon, Seam Binding, *Crumb Cake Tulle (#127840), Brights Designer Buttons, Basic Glimmer Brads, Brights Glimmer Brads, Circle Punches (3/4", 1", 1-1/4", 1-3/4", *1-1/4" Scallop (#127811), 1-3/4" Scallop), Piercing Tool
 

Tuesday, September 18, 2012

Pumpkin of Strips

Here is the second project we made for stamp club this month.  It uses one sheet of cardstock and a few scraps for the topper.  The pumpkin is about 7" wide and 5-1/2" tall.  The straw is a bunch of left over Crumb Cake strips I crumpled up.

The leaves were cut with the Autumn Accents Bigz Die and then stamped with the Wonderfall Stamp Set.  The little curls were made with thin strips of cardstock.  You know the ones.....you have a bunch of them left over from cutting down you cardstock for a smaller mat.  Use your Bone Folder and pull on the strip like you are trying to curl ribbon.  This will not actually curl the cardstock, but it will break up the fibers so it will curl better.  Then wrap the strip tightly around a pencil and slide off the end.  The leaves and curls were attached with some two way glue pen.
The main part of the pumpkin is made with 1" x 8-1/2" stips of Pumpkin Pie Cardstock.  I used 10 of them.  The 11th strip put too much stress on the brad to hold them together.  Each strip is embossed with different embossing folders.  The stem is a rolled up piece of Early Espresso with tiny cut fringe.  The stem holds on best with some glue dots.  You could also use hot glue gun. I didn't have mine handy.

Products Used:
Stamps:  Wonderfall (wm#128084, cm#128087)
Colors:  Pumpkin Pie, Gumball Green cardstock, Early Espresso and Garden Green Ink
Accessories:  Autumn Accents Bigz Die (#127812), Big Shot (#113474), Various Embossing Folders, Bone Folder (#102300)

Monday, September 17, 2012

Googly Ghouls Club Card

Last night was great.  I love meeting new ladies and the start of a new Stamp Club.  Here is the card we made.  It features several items from the current Holiday Mini Catalog: Googly Ghouls Stamp Set, Howlstooth & Scaringbone Designer Series Paper, Googlies, and the Basic Gray1/2" Striped Satin Ribbon.


All of the characters in the stamp set "Googly Ghouls" have places you can put googly eyes.  Stampin' Up! also has googlies with adhesive on the back of them for easy adhesion to your projects.


TIP:  To easily remove the googlie (also works for rhinstones and pearls) from the sheet, use the Piercing Tool.  Put the tip just under the eye.  Use the tool to the put the eye on your project hold in place with your finger and pull the tool out.

Products Used:
Stamps: Googly Ghouls (wm#128060, cm#128063)
Colors:  Basic Grey, Whisper White, Basic Black, Tangerine Tango, Pear Pizzaz (marker), Howlstooth & Scraingbone DSP (#126906)
Accessories:  1/2" Basic Gray Striped Satin Ribbon (#127837), Googlies (#127539), Spider Web Embossing Folder (#120889), Big Shot (#113439), Modern Label Punch (#119849)
Googly Ghouls Stamp Set (wm#128060, cm#128063)
Basic Gray 1/2" Striped Satin Ribbon (#127837)
Howlstooth & Scaringbone DSP (#126906)

Wednesday, October 26, 2011

More Halloween Ideas

I sure have some talented friends.  Here are a few more of the cards I received from swaps with my demonstrator friends.
Again all the stamp sets can be found in the 2011 Holiday Mini Catalog.


Tuesday, October 25, 2011

Halloween Ideas

One of the best things about Stampin' Up! is all the great friends you make.  I have gotten to meet many demonstrators from all over the US and Canada.  One of the enjoyable things we do throughout the year is swap cards.  These are some of the Halloween cards I have received from my great Stampin' Up! Demonstrator friends.  All of the stamp sets can be found in the Current Holiday Mini Catalog.

Contact me today to find out more about becoming a Stampin' Up! Demonstrator.  Join during October and receive a Big Shot (or choice of $100 worth of product) for FREE!