Showing posts with label Big Shot. Show all posts

Wednesday, August 12, 2015

"Thank You" Workshop Cards--Day 2

Yesterday I share a couple of the cards from a private workshop I had last week.  Here are the last two cards we made.

I turned to the catalog for inspiration on the next card.  I found this card on page 17 in the 2015-2016 Stampin' Up! Catalog.  If you used the Happy Patterns Decorative Masks (#138313) you will get wonderfully spaced dots.  With 10 people rotating through the card making stations, I didn't want to be cleaning the mask between stampers.  Instead we used the eraser on a standard pencil.  I labeled each pencil for the color of ink used.  We used 5 colors from the Subtles Collection.  Calypso Coral, Marina Mist, So Saffron, Wild Wasabi, and Wisteria Wonder.


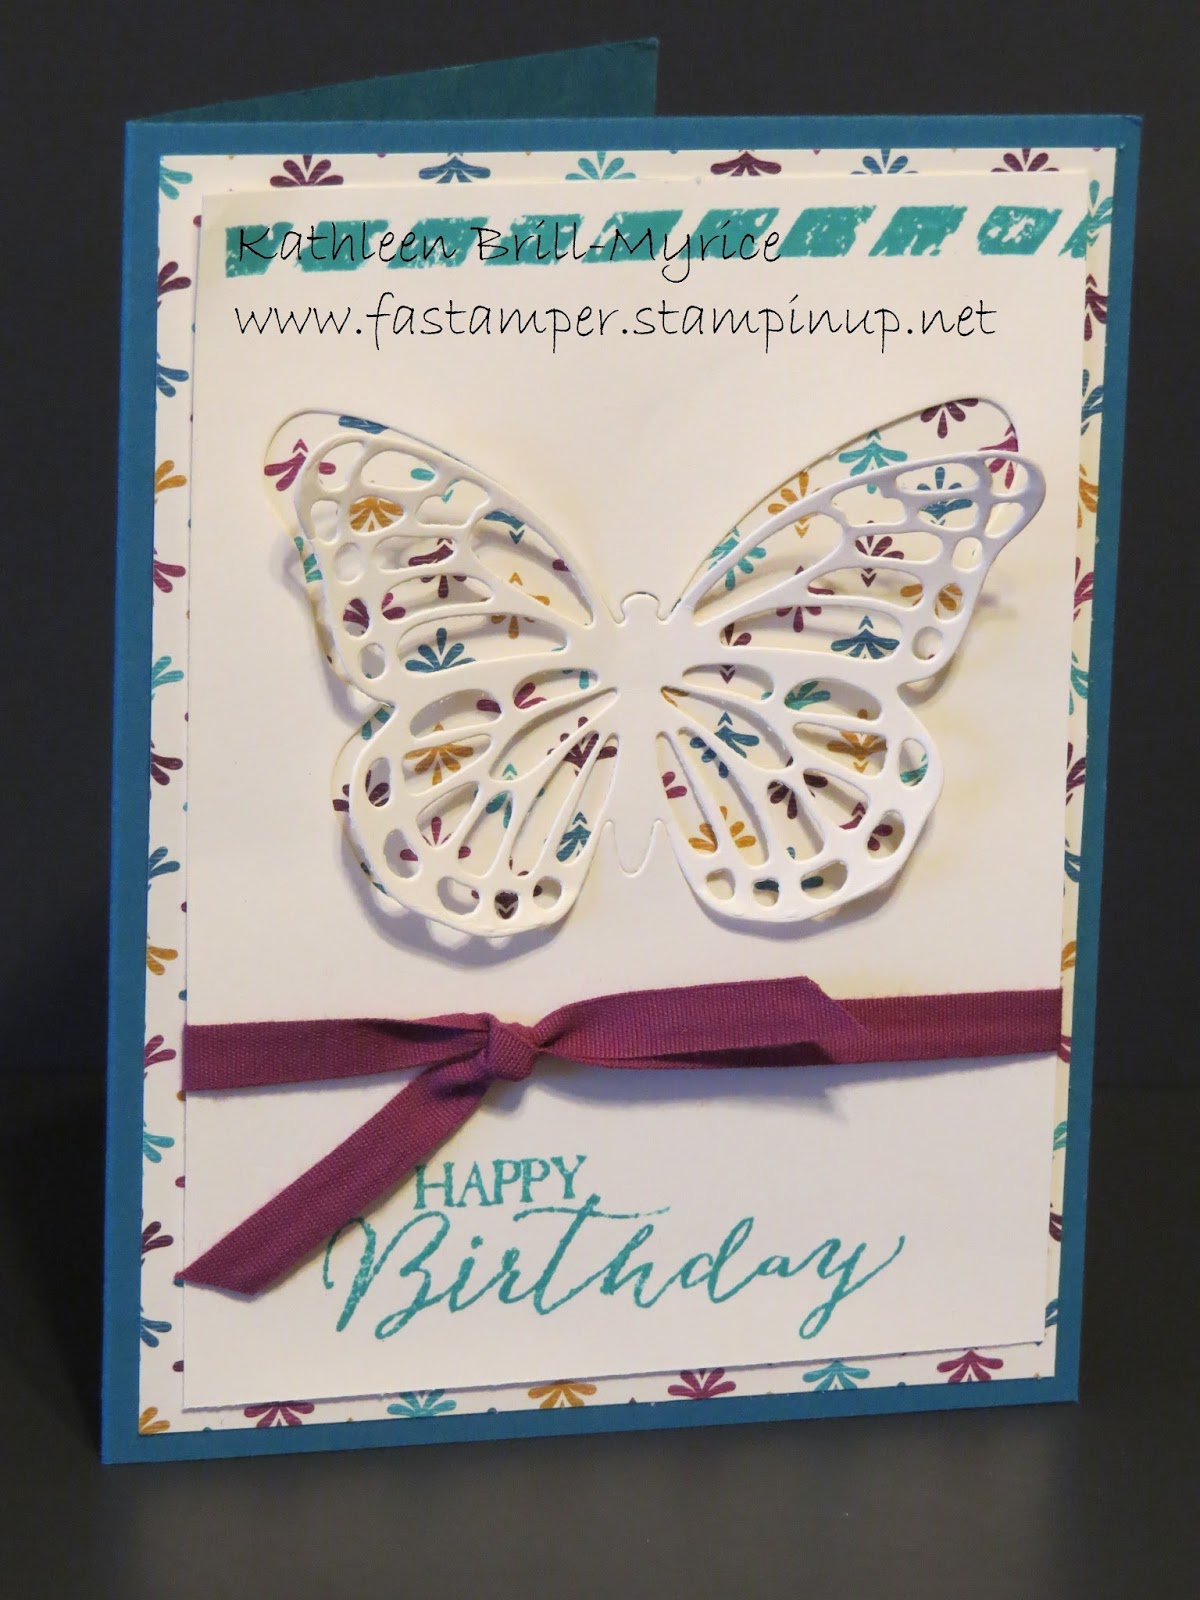
The last card uses my new favorite background stamp Watercolor Wash (#138704).  We inked the stamp in Mint Macaron and stamped it on the Whisper White Note Cards (#131527). The die cuts are from the NEW Greetings Thinlets (#138275) and the NEW Bold Butterfly Framelits (#138135).

I had a wonderful time with her team.  If you would like to have a workshop with your group, please contact me.  It can be a church group, a scout group or any group who would love to give handmade cards to someone.

PRODUCTS USED:
Built for Free Using: My Stampin Blog


My Demonstrator Website

Wednesday, July 1, 2015

Red, White & Blue Week-Day 3

I made a beautiful Red, White & Blue butterfly the other day, but was not sure how I wanted to use it.  Then I got a text from a friend of mine.  Her family was driving across country from one duty station to their next and they were passing through my area.  We only got two hours to visit before they had to continue their drive, but those two hours meant a lot to me.  I sat down this morning and made this card for her.  


I have yet to figure out how to take a good photo of a white card with embossing in the background.  If you look closely, you can see the Fluttering Embossing Folder(#139304).  The butterfly was made with the Bold Butterfly Framelits (#138135) and the Butterflies Thinlets (#137360).  I cut a solid Pacific Point butterfly, then cut one Whisper White and one Real Read lacy butterfly.  I adhered the white one to the blue, then put the little red pieces in the spaces.  I used glue stick on half the blue area at a time.  If I made another one, I would attach the white one with glue stick and then put little dabs of Multipurpose Liquid Glue on the little spaces for the red bits.  By the time I got to the end of attaching the red bits the glue stick had dried and the bits kept falling off.

PRODUCTS USED:
Built for Free Using: My Stampin Blog


My Demonstrator Website

Friday, June 26, 2015

Layered Letters--Last Day

I hope you have enjoyed this week with the stamp set Layered Letters.  It truly is a wonderful alphabet set.  I have one last project to show you.  The inspiration for this came from the Baby card I showed you yesterday.  I like to keep various cards on hand for a last minute need.  Baby cards are tough though.  I never know which gender I might need, so I end up making them neutral colors.  It has also been 6 years since I was on the receiving side of the baby card.  Things have sure changed in that short time and now, gender reveal announcements are all over the place.  I live far from my family, how cool would it have been to announce the gender with a card.


The Layered Letters Stamp Set has several additional symbols.  I used the # sign the other day.  How perfect is the ? sign for this project!  I used my Stampin' Write marker to draw in the apostrophe.  Then of course we have the REVEAL!  (And so my blog reading family and friends know--I am NOT having another baby!)


How much do you love that cute print used inside the explosion box?  It is from the Go Wild Designer Series Paper Stack.  And the ribbon?  I loved the Stitched Satin Ribbon in the last catalog.  I was so glad to see them get 5 fresh colors for it this catalog.  

PRODUCTS USED:
 
Built for Free Using: My Stampin Blog

My Demonstrator Website

Wednesday, June 24, 2015

Layered Letters--Day 3

The stamp set is called Layered Letters, but I haven't showed you the layered part yet this week.  Today I have LAYERED letters meets Weekly Deals.  This stamp set is perfect for making monogrammed projects for your friends.  It can be easily adapted to place cards or name tags also.


There are two shapes in the stamp set that you can "layer" the letters on top of.  There is the rectangle shown on this project and a circle shape.  To give it the layered look I stamped off the rectangle on my Grid Paper (#130148) and stamped the letter full strength with Melon Mambo Ink.
I used a few of the products from the Weekly Deals this week.  The Mini Treat Bag Thinlets (#137547) are on sale and make this cute little bag.  There are also thinlets in the set to punch 3 different trims, I used the hearts trim on the tag.  There are several other thinlets in the set to add to your projects.  The Silver Glimmer Paper (#135314) used for the tag is also on sale this week.

TIP:  The tag is tied at the top with the Jute Ribbon.  I cut a 6" length of Jute and trimmed off about 6 of the strands in one strip.  After looping it to the tag I pulled apart the rest of the Jute strands.

PRODUCTS USED:
Built for Free Using: My Stampin Blog


WEEKLY DEALS:  Update automatically to show the current deals.
Built for Free Using: My Stampin Blog


My Demonstrator Website

Thursday, June 11, 2015

Butterfly Basics cont.

Sorry for the late posting today.  We had internet problems.  1.5 hours on hold and it is back up and running.  On with the card sharing.....

Today I have another vintage style card with the Butterfly Basics Stamp Set (#137154).  I used the same general color scheme as yesterday.  The mess was stamped in So Saffron.  I wanted to help the tag stand out a little and not blend into the card front area.  The smaller butterflies are done in Blushing Bride to match the card base.  The leaves are a bit harder to see in this photo.  They are under the butterflies and were stamped multiple times in Pear Pizzazz without reinking.  The lines on the left are Wild Wasabi and the sentiment and postmarked symbol are done with Soft Suede.

THE BUTTERFLY:  I cut it out of Vellum using the coordinating Butterfly Thinlet (#137360), then I stamped it with the mesh image in So Saffron and Blushing Bride.

RIBBON TIP:  I like to adhere my ribbon with snail adhesive to the back of the cardstock.  I put snail on the cardstock and press the ribbon/trim down.  I cut my ribbon 2" longer than the card length.  Then I cut another 2-3" piece to tie onto the first giving an impression of a tied ribbon.  I find it saves ribbon and makes it easier to get the ribbon tight and straight.  I can also more easily place the knot where would like.

PRODUCTS USED:
Built for Free Using: My Stampin Blog


My Demonstrator Website

Tuesday, June 9, 2015

Thinlets Overlay card

I have gotten several new stamp sets in the last month or so (shhhhh, don't tell my hubby).  I am a sucker for stamp sets with a coordinating thinlit die.  Sometimes I use the stamp set first, but this time it was all about the thinlets.

The Butterfly Basics Stamp Set (#137154) from the Occasions Catalog carried over into the 2015-2016 Stampin' Up! Catalog.  If you purchase it with the coordinating thinlets (#137360) you save 15% with the bundle (#138865).  This card is easy to duplicate and I have seen many a version on Pinterest.  Cut your Designer Series Paper at 4" x 5-1/4".  I used Bohemian DSP (#138446).  Then cut your top layer at 3-3/4" x 5".  Using your Big Shot(#113439) and Magnetic Platform (#130658) to keep the framelit from shifting, place the framelit on your cardstock and cut.  When you assemble the card, simply use a few Mini Glue Dots(#130683) to attach the die cut shape in the center.  When I cut my shape I felt it was too low, so I balanced it by stamping an image from the set across the top.  I sentiment at the bottom and a coordinating piece of ribbon and I was done.

PRODUCTS USED:
Built for Free Using: My Stampin Blog


PAPER PUMPKIN REMINDER:  June 10th is the last day for new subscribers to get 50% off the first two months of a subscription.  Use Promo Code SAVE50 when subscribing at PAPER PUMPKIN.


My Demonstrator Website

Monday, May 25, 2015

Celebrate Baby!

I pulled out the Celebrate Today Stamp Set (#137138) from the occasions catalog.  This stamp set is wonderful for birthday cards and other reasons to celebrate.  The stamp set contains words useful for wedding, graduation, and baby also.  I decided to go with a baby card today.


I stamped the solid balloon image in So Saffron and stamped the "baby" banners in Calypso Coral on top.  The set also comes with the accessories to put a bow, string, tail or basket on the balloon.  There is a coordinating set of framelits (#137362) to help cut out many of the shapes.  You can save 15% by purchasing the stamp set and framelits as a bundle (#138869).  I created the stars side with the Confetti Stars Boarder Punch (#135861) and put a piece of Gold Foil Sheet (#132622) behind to show through instead of the Pear Pizzazz card base.

While I made this card in a gender neutral color scheme, it could very easily be done with pinks, blues, or nursery colors.  All of the products I used are available today and will carry over into the new catalog starting June 2nd.

PRODUCTS USED:
Built for Free Using: My Stampin Blog


My Demonstrator Website

Thursday, August 1, 2013

NEW PRODUCTS START TODAY!

The Holiday Catalog starts today.  Get all your needs for the Fall and Winter Holidays in one place.  This catalog is packed with great products and even better ideas for projects to make with them.  CHECK IT OUT HERE>

Today also marks the start of a NEW PRODUCT for Stampin' Up!  Thinlits Card Dies.  I got the chance to see these in action at Convention.  Oh My Goodness!!  I am ordering mine today.

They've been called flip cards, flip flop cards, swing cards, and more-but they have always been a bit tricky to create. Not anymore! The amazing new Thinlits Card Dies cut and score to create a card that flips in just one step.
ItemDescriptionPrice
133479Label Card Thinlits Die$32.95
133480Circle Card Thinlits Die$32.95


These Thinlits come with more then just the card form die.  Check out the FULL FLYER HERE.


ORDER PRODUCTS ONLINE 24/7 or Check out my Class Calendar at My Demonstrator Website

Sunday, July 28, 2013

3D Swap for Convention

I found myself all packed, ready to go to convention with 8 hours to spare this year.  All my card swaps were done and I was just waiting out the time till I could go to the airport.  What is a stamper to do?  Make more swaps.  I sat at my work table, got out my Big Shot and went through my dies.  The Petite Purse Die has been sitting there patiently until I was ready to use it.  So Glad I Did!!

These were a hit at convention.  I thought it was so simple.  Maybe that is what appealed to everyone.  My only problem.....I forgot to put my name on them.  As you can see again, I am in love with this years In Colors.  The Stretch Ruffle Trim is fabulous also.  You can stretch it out for a less ruffled look if you like.  I used it in its unstretched full ruffle form.

The flower on front was made with three punched out 1-1/4" Scallop Circles.  I used the In Color Designer Series Paper Stack.  I crunched them up by hand and held it to the purse with a brad.

The Ruffle Trip was put on in two strips that shared the handle space with some sticky strip.  These are fast to make and perfect for just about any occasion.  I'm thinking wedding favors, baby shower or little girl birthday.  They hold a few pieces of small candy.  I put Chocolate Covered Macadamia Nuts in mine.

PRODUCTS USED:
Stamps: None
Cardstock: 2013-2015 In Colors #131200
Accessories:  Big Shot #113439, Petite Purse Bigz L Die #125606, 2013-2015 In Color Designer Series Paper Stacks #130136, sticky strip #104294, 1-1/4" Scallop Circle Punch #127811, Ruffle Stretch Trim (available in all 5 In Colors)

Ruffle Stretch Trim Product Order Numbers
Pistachio Pudding #130020
Crisp Cantaloupe #130021
Baked Brown Sugar #130022
Strawberry Slush  #130023
Coastal Cabana #130024


Order products online 24/7 at My Demonstrator Website

Wednesday, October 31, 2012

Happy Halloween--Boo Wreath

Happy Halloween everyone.  I have been wanting to make one of these wreaths for sometime now.  I was able to sit down for 4 hours the other day and make this one.  Now that I have done one, I am sure the next won't take quite as long.  Most of my time was spent planning and getting my kids out of my craft space.

All of the rosettes were done with the Designer Rosette Die.  Though I didn't use the decorative edge area of the die, it made scoring all the fold lines much faster.  The larger of the rosettes were all made with solid colored pieces of cardstock cut at 2" x 11".  Each rosette used two strips of cardstock.  The smaller rosettes were made with two strips of 1-1/2" x 12" pieces of Howlstooth & Scaringbone Designer Series Paper from the Holiday Mini Catalog.

Here are a few close ups of the details on the rosettes.  I used a variety of accessories to decorate each rosette, including ribbons, glimmer brads, and buttons.  The "BOO" Banner was cut with a retired set of Big Shot Alphabet.  I chose this one as I wanted larger letters.  I have another wreath in the works that will use the current Big Shot Alphabet in the catalog.  I used the center  piece left from the "O" to make the eye.  I put a smaller black circle on top of the center and cut it down to be at the bottom of the eye area.  The Large Basic Pearl finishes off the detail.  The straw is Crumb Cake cut into thin strips and crumpled up.  There are also bits of Crumb Cake Tulle stuck under the edges of some rosettes.


The entire thing is held together with some two way glue pen and a whole lot of Hot Glue.  The new Silicone Mat makes this a much easier process.  I found the wreath form at the holiday sale area of a local big box retailer.  Think big red and white circles.


PRODUCTS USED: *Denotes Holiday Mini Catalog
Stamps: NONE
Colors: Basic Black, Basic Gray, More Mustard, Tangerine Tango, Very Vanilla, Crumb Cake, *Howlstooth & Scaringbone DSP (#126906).
Accessories:  *1/2" Striped Satin Ribbon (#127937), Linen Thread, 1/8" Taffeta Ribbon, Seam Binding, *Crumb Cake Tulle (#127840), Brights Designer Buttons, Basic Glimmer Brads, Brights Glimmer Brads, Circle Punches (3/4", 1", 1-1/4", 1-3/4", *1-1/4" Scallop (#127811), 1-3/4" Scallop), Piercing Tool
 

Tuesday, October 30, 2012

Baby Wipe Leaves

Here is the final project we made at this month's stamp club.  We used a variety of techniques for the leaves.


  • The Tangerine Tango leaf was run through the big shot with the Perfect Polka Dots Embossing Folder.  
  • The Early Espresso Leaf was made with the new Core'dinations Cardstock in the Holiday Mini Catalog.  You emboss the cardstock and then use the sanding block to rub away the raised area exposing the inner core.  Unlike the rest of Stampin' Up! cardstock the core is not the same color as the outer layer.
  • The little leaf was made using the baby wipe technique.  See Tutorial Below.

The window was first made using the Labels Collection Framelit and then run through the Fancy Fan Embossing Folder.  There is a piece of Very Vanilla cardstock behind the window.  The sentiment is stamped in Early Espresso Ink.  The Naturals Designer Buttons new to the Annual Catalog on page 176.  It is held on by a dimensional.  The entire front mat is put on the Crumb Cake card base with dimensionals.  Instead of stamping the envelope, we embossed it with the woodgrain folder available in the Holiday Mini on page 33.

PRODUCTS USED:
Stamps:  Wonderfall (wm#128084, cm#128087), Curly Cute (wm#117014, cm#120510)
Colors: Crumb Cake, Very Vanilla, Early Espresso, Core'dinations Cardstock Early Espresso (#127848), Tangerine Tango, Cajun Craze, More Mustard
Accessories:  Big Shot (#113439), Naturals Designer Buttons (#127554), Dimensionals (#104430), Autumn Accents Die (#127812), Woodgrain Embossing Folder (#127821), Fancy Fan Embossing Folder (#127751), Perfect Polka Dots Embossing Folder (#117335), Labels Collection Framelits (#125598), Linen Thread (#104199)

BABY WIPE TECHNIQUE:  Make your own custom multi-color ink pad.

1.)  Gather your materials.  You will need a disposable plate to protect your work area.  I used paper, plastic works nicely too.  Do NOT use your good dishes.  1-2 baby wipes.  You will also need 2-3 reinker colors.  If the stamp is large you might be able to use more than 3 colors, but it starts to look muddy.  I used Cajun Craze, Tangerine Tango and More Mustard here.
2.)  Fold the baby wipe so it is about 4 layers thick.  Put it on the plate.

3.)  From a height of about 1 inch, put 1 drop of your darkest reinker onto your baby wipe in 2-3 places.  The reinker will spread out some on the baby wipe.  
4.)  Do the same with the second color.

5.)  Fill in any blank areas with your lightest reinker color.  You want the colored area to be as big as the stamp you plan to use.

6.)  Stamp as you normally would.  CLEAN OFF YOUR STAMP BETWEEN EACH USE.  The colors will become muddy if you don't clean your stamp off. 

Saturday, February 25, 2012

Odd Job for the Big Shot

This one is not a paper crafting projects, but still a really great use of my Stampin' Up! tools.  My daughters teacher asked the other day if I could cut her some foam circles.  The kids use them in class for their math lessons.  (Don't ask me how.  I am not sure).  I of course replied that I have something that could easily cut her a bunch of circles.
I went home and pulled out my Big Shot.  The foam she gave me was about 1/8" thick.  It came in small sheets.  I cut the foam into strips with my scissors then used the Circles #2 Original Die to cut them with the big shot.  So easy and saved her a ton of money over buying the ones at the teacher supply store.  The die will cut 4 circles of different sizes.  I used the second smallest one.  I did them in 4 different colors so the kids can do different values for each color.


Friday, February 10, 2012

Valentine Class Project #2 of 4

First can I mention how much I totally love the Matchbox Die.  It makes projects so simple and fast to do.  Last week I showed you one matchbox die project for a friend.  I decided to change it just a little bit and do one with my ladies for the Valentine Class last Monday.  Like yesterday's, this project is done in Rose Red and So Saffron.

The tag on top features the NEW Framelits and the Apothecary Art Stamp Set.  I love the new framelits.  Thin and easy to store, nesting shapes so you can mat things easily, and they have so many uses.  Today they are used the most common way, cut out an image with a coordinating shape.  I stamped the image twice onto Whisper White cardstock.  Once in the Rose Red and again in So Saffron.  The first I put through the Big Shot with the Framelit.  The second one I used a marker to color the words in Rose Red before stamping.  I then punched out the center with a 1" circle punch and attached it with a dimensional.
The nuggets inside the box are wrapped with So Saffron cardstock and then with images from the It's A Wrap Holiday.  The It's A Wrap Holiday Stamp Set was in the Holiday Mini.  It is not available as a stamp set at this time, but you can purchase the Digital Download.  Don't have My Digital Studio is available as a FREE download.  Try it out for 30 days.  I know you will love it.  The bow is made using the folk tying method and attached with a mini glue dot.  What is the "fork tying method"?  You will have to come back tomorrow to find out.

ORDER ONLINE 24/7 at My Demonstrator Website.  Order $50 in Product (before tax and shipping) and receive a Sale-A-Bration item for FREE! and a Frequent Stamper Miles Token from me.

Products Used:  
Stamps:  Apothecary Art (wm#125525, cm#125527), It's A Wrap Holidays (Digital Download #127613)
Colors: So Saffrom, Rose Red, Whisper White
Accessories: Labels Collection Framilts (#125598), 1" Circle Punch (#119868), White Taffeta Ribbon (#109070), Dimensional (#104430), Matchbox Die (#114890), Big Shot (#113439), Mini Glue Dots (#103683)


Thursday, February 9, 2012

Valentine's Class Project #1 of 4

Last Monday night I had my Valentine Class.  We made 4 projects, I have the first for you today.  Inspiration came from the cutest little candy holder swap I received at Leadership last month.  This is my version.  It features the Top Note Die and the Teeny Tiny Wishes stamp set.  You could make these in any color for any reason.  I chose to make it in Rose Red and So Saffron.

I started with a piece of 4-1/4" x 11" cardstock scored in half at 5-1/2".  I put the folded cardstock onto my Top Note Die with the end just before the curvy details so I wouldn't cut the end off.  I then scored 1/4" from each side of the fold and again from point to point across one Top Note.  With the excess cardstock from cutting the shape I cut a 1"x 4-1/4" piece and scored at 1/4", 3/4", 3-1/2" & 4".  I put sticky strip on each end of the 1" strip and again just inside the 3/4" and 3-1/2" score lines.  This piece was adhered inside the front area to make a pocket for the candy.
I decorated the front with a scrap of Designer Series Paper (this pattern is retired, but there are others just as wonderful in the Designer Paper Patterns Stacks), some taffeta ribbon and a simple tag punched with the word window and modern label punch.  The "LOVE" stamped at the top is from the FREE Sale-A-Bration Stamp Set Outlined Occasions.

Be sure to check back in the coming days for the other projects made at the Valentine's Class.

ORDER ONLINE 24/7 at My Demonstrator Website.  Order $50 in Product (before tax and shipping) and receive a Sale-A-Bration item for FREE! and a Frequent Stamper Miles Token from me. 

Sunday, February 5, 2012

Fun Flowers Bag Tag

Along with the Matchbox Candy Gifts from yesterday's post, my friend ask me to make her something for her downline going to the regional event.  In the past I have made her entire group calendars, cards, and candy treats.  This time I wanted something more personal they could use everyday.  Also something that would show they were a part of the group they were with.

Keeping it simple for her event, I made my friend's regional event group a tag they could put on their bag of goodies they get from the company.  Later they can hang it on their purse as a conversation starter.  Each tag has two double sided flowers made of chipboard cut with the Fun Flowers Big Shot Die.  The chipboard was first covered with Designer Series Paper from the Soft Subtles Paper Patterns Stack.  I adhered the DSP to the chipboard with a Glue Stick.
After running it through the big shot, I punched a hole in the top with the Crop-A-Dile.  The labels on each side were printed onto Whisper White cardstock using my computer.  They have information like, the location of the event, the company event theme and the name of my friends downline group.  The Pretty In Pink letters are the first initial of the ladies names and were cut with the Timeless Type Jr. Alphabet.  I attached them with a two way glue pen.  The ribbon is from the 1/2" Scalloped Dots Ribbon Series.
With my families upcoming move for the army to Hawaii, I think I am going to make similar tags to help locate our luggage faster at the airport.


Products Used:  Soft Subtles Paper Patterns Stacks (#117152), Glue Stick (#104045), Fun Flowers Die (#121812), Crop-A-Dile (#108362), 1-3/4" Circle Punch (#119850), Timeless Type Alphabet (#115951), Two Way Glue Pen (#100425), Pretty in Pink Scalloped Dots Ribbon (#124141), Big Shot (#113439)


ORDER ONLINE 24/7 at My Demonstrator Website.  Order $50 in Product (before tax and shipping) and receive a Sale-A-Bration item for FREE! and a Frequent Stamper Miles Token from me.


Fun Flowers Die (#121812)

1/2" Scalloped Dots Ribbon (Shown in Pretty in Pink #124141)

Saturday, February 4, 2012

Mixed Bunch Matchbox Die

A friend of mine is a consultant for another direct sales company.  This weekend she is getting together with other consultants for a regional event.  She knows several of the trainers for the event and asked if I would make them a simple thank you.  This is what I came up with.

The box the candy is in is from the Matchbox Die.  This Big Shot die will cut the box, the sleeve, and three different tag labels.  I just used the box.  It will cut the shape and fold lines making assembly easy to do.  I stamped one of the small images from the Mixed Bunch stamp set and then hand wrapped the sleeve around the box, holding it shut with some Sticky Strip.  The flower is stamped from the Mixed Bunch stamp set and punched with the coordinating Blossom Punch.  The center of the flower is a Bold Bright 3/16" Brad.  I wrote the trainers name in Tempting Turquoise marker onto the Modern Label tag.
Inside the box are 4 pieces of chocolate nuggets.  Each has been wrapped with a strip of Old Olive cardstock. I stamper the label for the chocolate twice.  Once in Temping Turquoise and again in Melon Mambo.  I cut out the Melon Mambo center and adhered it with some snail over the Tempting Turquoise one.
NOTE:  You can stamp the wrap imaged onto mailing labels, but do not attach them to the pieces of chocolate directly.  The glue for the label is not safe to put on the chocolate.  It can soak through the chocolate wrapper.  Be sure to attach the label to a piece of cardstock first.  I also found that the ink does not stamp clearly on the mailing labels and looks a bit fuzzy.

Products Used from the Occasions Mini Catalog (ends April 30, 2012)
Mixed Bunch Stamp Set (wm #125535, cm #125537), Blossom Punch (#125603)
 Other Products Used:  It's A Wrap Stamp Set (wm #123590, cm #123592), Matchbox Die (#114890), Big Shot (#113439), Bold Bright 3/16" Brads (#119740), Modern Label Punch (#119849), Sticky Strip (#104294), 3/4" Circle Punch (#119873)
Colors for Cardstock, Ink & Markers: Melon Mambo, Tempting Turquoise, Old Olive, Whisper White

ORDER ONLINE 24/7 at My Demonstrator Website.  Order $50 in Product (before tax and shipping) and receive a Sale-A-Bration item for FREE! and a Frequent Stamper Miles Token from me.


Thursday, October 27, 2011

Simple In Color Treats

Last month I had a need for some quick little thank you's.  The Top Note Die for the Big Shot is perfect when you need something fast.  

I cut the Top Note shape from a piece of each current In Color cardstock.  Then a scored a couple lines on both sides of center for my mini candy bars to fit into.  It isn't necessary to score the lines, but I am just like that.  I put a little bit of snail adhesive inside to help the candy bar from sliding out the side.  Using my Crop-A-Dile I punched a hole in the top and tied a piece of ribbon through it.  The front image is stamped with the Oval All Stamp Set and punched out with the scallop oval punch.  I used Stampin' Write Markers to color a little bit on the image.

Here is a close up of the treats.

The 2010-2012 In Colors.  Available until end of June 2012 (Front to Back)
Poppy Parade, Blushing Bride, Peach Parfait, Pear Pizzazz, Concord Crush

The 2011-2013 In Colors.  (Front to Back)
Lucky Limeade, Pool Party, Calypso Coral, Wisteria Wonder, Island Indigo

ONLY 4 MORE DAYS LEFT ---GET YOUR FREE BIG SHOT FOR BECOMING A STAMPIN' UP! DEMONSTRATOR DURING OCTOBER.  Contact me or your local demonstrator today for more details.  

Tuesday, October 18, 2011

Christmas Card without a Christmas Image

It is getting closer.  Have you been thinking about your Christmas cards for this year?  Do you have your stamp  set picked out yet?  Maybe you don't have any Traditional Christmas images or don't want to use the same one as last year.  Maybe your budget is just tight and you want a stamp set you can use all year long.
I have the answer for you.  "Delicate Doilies"  (wm#122590, cm#122592) found on page 127 of the 2011-2012 Idea Book and Catalog.  This stamp set can be used for just about any occasion.  All you need is a sentiment for whatever purpose you need a card.

All three of these cards use the Delicate Doilies Stamp Set along with the Curly Cute Stamp Set.  A simple change of the colors and presto.  The colors are all from the Bold Brights Color Collection and the buttons are all found in the Bold Bright Designer Buttons Pack.  If you don't have a lot of ink pads yet, I would suggest the Stampin' Spots.  You get an entire color collection of 1" ink pads for a fraction of the cost of a set of full size ink pads.  Later, when you find yourself using one color more often, you can purchase the full size pad.  It is a great way to start when you are not sure what colors you will use the most.
Here are some close-ups of the cards.  Each one also uses an embossing folder on the right hand side.  You could just as easily stamp this area in a tone on tone manner or even leave it blank.  As always my favorite way to step up a card is with dimensionals.  I used them under the sentiment strip.  The button is held on with a mini glue dot.


Products Used:
Stamps : Delicate Doilies (wm#122590, cm#122592), Curly Cute (wm#117014, cm#120510)
Cardstock: Bold Brights (#119706), Whisper White (#100730)
Ink: Bold Brights Classic Ink (Full size #119694, Stampin' Spots #119714)
Accessories:  Bold Bright Designer Buttons (#119747), Linen Thread (#104199), Dimensionals (#104430), Mini Glue Dots (#103683), Big Shot (#113439), Embossing Folders--Stripes (#123128), Vintage Wallpaper (#120175), Petals-a-Plenty (#116824)

Sign-up to become a Stampin' Up! Demonstrator by October 31, 2011 and get a FREE Big Shot!  Already have a Big Shot, select $100 worth of Stampin' Up! Products of your choice.  Contact me today with questions about becoming a Stampin' Up! Demonstrator or go to my Demonstrator Website to sign up today.