Wednesday, September 30, 2009

Clearance Rack


Do you have an item you miss dearly in the new catalog? Is there that one Designer Paper you wish you had more of? You may be in luck. Stampin' Up! is cleaning out the warehouse. They are purging those discontinued items that are taking up valuable shelf space. AND they are slashing the prices to move them out faster.

All of the items on the Clearance Rack are discontinued. They will never be seen again in a Stampin' Up! catalog. Do you want me to tell you what they are? Well.........I can't. Why you ask? Because they are changing as the inventory levels in the warehouse changes. They are first come-first serve and when they are gone that is it, Stampin' Up! will not be getting anymore.

Where do I find these items? In the online store. Go to My Stampin' Up! website and click on "shop now" in the upper right corner. Then click on "Clearance Rack" on the left. Be sure to check back as the items will be changing without notice.

What if I want current items also? That is fine. Put it all on one order. You can still get all of the great hostess benefits for orders over $150. (before tax and shipping)

Can I return the items if I change my mind? NO Clearance Rack items are final sale. If the item is defective Stampin' Up! will exchange it for something else, but there are no returns or refunds.

What kind of things will I find? It could be anything. I checked today and found felt snowflakes, designer papers, ribbon from two years back and rub-ons perfect for the holidays coming soon. Be sure to check back periodically for any additions to the Rack.

October Card Kit

CARD KIT OF THE MONTH- October 2009
Featured Set: “Berry Christmas” and Featured Accessory: Red Bead Duo

In this kit, you'll receive the supplies to create SIX of EACH design shown above - so you will receive all of the consumable supplies that you need to create 12 cards total.

You will also receive 2 additional full color samples of "alternative" cards that you can make with the combined contents of the kit, as well as step by step instructions on how to complete each of the 4 designs.

Card Kit Price is just $15--that's 12 cards, plus envelopes for just $15!

Each month, the card kit also features both a Stamp Set of the Month and an Accessory of the Month. If you purchase the card kit, you may also purchase these items at 15% off!

October Featured Products:
Berry Christmas Stamp Set ($22.95) $19.51 with the purchase of the Card Kit
Red Bead Duo Originals ($9.95) $8.46 with the purchase of the Card Kit

What else will you need? See the list below for items that were used to create the cards in this kit. If you already have everything--just buy the card kit and you are ready to create!

If you don't have everything--place a product order with your kit (don't forget about the discount on the "featured products!")

Or--you can use the card kit to create your own designs using other stamps and inks that you already have--the choice is yours!

Orders for the Card Kits must be received by October 10th. You will receive your kits by the end of the month.

Call or email me today to order:
Kathleen Brill-Myrice
Fa_stamper@sbcglobal.net
580-595-9333

Please Note: I am glad to ship kits directly to you! If the kit needs to be shipped, there will be an extra $3 shipping charge.

Products you will need to complete cards as shown:
Old Olive Classic Ink Pad ($5.95)
Real Red Classic Ink Pad ($5.95)
Chocolate Chip Classic Ink Pad ($5.95)
Encore! Gold Ink Pad ($8.95)
Ticket Corner Punch ($6.95)
Stampin’ Sponges ($3.50)
Four the Holidays Stamp Set ($13.95)
Berry Christmas Stamp Set ($22.95) $19.51 with the purchase of the Card Kit
Red Bead Duo Originals ($9.95) $8.46 with the purchase of the Card Kit
Stampin’ Dimensionals ($3.95)
SNAIL Adhesive ($6.95)
Tombow Multipurpose Adhesive ($3.95)
Bone Folder ($6.95)
Paper Snips ($9.95)
Mat Pack ($9.95)
Paper Piercer ($3.50)

Monday, September 21, 2009

Redeployment Layout

Just to clarify, "redeployment" means the soldiers came home, not they are going again. Strange I know, that is the military for you. Why they don't just call it a "coming home" ceremony I will never know.

This layout was made with the My Digital Studio of course. I started with two photo templates. The one on the left no longer resembles the template. The one on the right is almost exact. I altered the photo sizes a little bit. All of the elements on the page (photo mat, photo corner, star, title) were color matched to one of the brighter shades in the curtains of the "Welcome Home" picture.
The background is the Textured Cardstock in Going Grey. The horizontal line on the left page and vertical line on the right page is stitching. If you look closely you can see the shadow on the title. The program allows you to make the shadow any color, as dark or light as you wish, and as far from the letters in any direction you choose. The stamp next to the star is from the "Define Your Life" stamp set.
Only 9 more days and you can order My Digital Studio for yourself.

Saturday, September 19, 2009

Baby Card with My Digital Studio

Are you not in love with My Digital Studio yet? Can you tell that I am? I have made some regular cards with cardstock, ink and stamps this week. But this program is so much fun to show you. Here is another card I put together with the program. It shows off some of the designer papers and embellishments. The sentiments look funny on the computer image, but will print clearly in real life. I like this card a lot and may order a few prints for all those post deployment babies I expect the ladies in our unit to have.

My Digital Studio come with Designer Series Paper in all 12 prints and 34 colors. You can also select from all the Designer Papers in 6 different Simply Scrappin' Kit. I selected one of the prints from the ""Rock-a-Bye" Simply Scrappin' Kit for this card base. The great thing is the inside of the card is still white. If you use the professional printing service for Stampin' Up! the color with be an exact match to SU! colors and the card base will be stronger than if I had mounted the Designer Series Paper onto a Whisper White card base.
The papers for the rest of the focal area and punched out sentiment are also from the "Rock-a-Bye" Simply Scrappin' Kit. The stamps I used are from the "Nursery Necessities" Stamp Set. I added a piece of Certainly Celery Ribbon and a Ribbon Knot to the card, as well as a couple of Chocolate Chip Brads to the sentiment area. The shape was made with the Modern Label Punch. You can fill in the punch area with any of the colors available in the program.
The inside was done by stamping the sentiment in Chocolate Chip (again, easy to change to any color) and layering it onto another stamped image, this time in So Saffron.
Check back later for how to make the color match anything in your project.

Friday, September 18, 2009

Cards with My Digital Studio

I have shown you a number of scrapbook pages made with My Digital Studio, but did you know you can do other things. I was playing the other day and came up with this card. It is a digital version of a card I am planning to use for an upcoming Christmas Stamp-A-Stack.
I started with a blank card and added a Bashful Blue Background. I made the background a bit opaque to help it blend with the moon. The moon is done in Summer Sun and also made opaque. The ground was done by adding a torn edge to a layer of Whisper White. The reindeer is stamped full strength.


On the inside of the card I used small bits of whisper white to cover up the "o" in "Holiday Season" and stamp a snowflake in it's place. I am hoping to work on some videos for using My Digital Studio, but my kids make background noise a little hard to control. My Digital Studio is available for purchase on October 1st.

Monday, September 14, 2009

Shimmer Paint

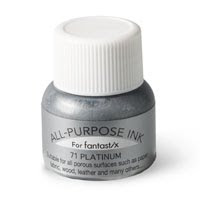
Pictures just can't do this product justice. Found in the Holiday Mini Catalog on page 27 is Shimmer Paint. It comes in three colors: Frost White, Champagne Mist, and Platinum. Each comes in a .5 oz. bottle and is just as it names suggests a "paint". You don't need a brush for this paint though. And better yet, it works with STAMPS!
The best way for me to describe this wonderful product to you is a craft pad that shines. I wouldn't call it glitter. It is more of a hologram shimmer type look. Depending on the cardstock color you stamp it on, it has a different look. I have three examples below of the shimmer paint. Each uses the stamp set "Serene Snowflakes", a 4 piece stamp set found on page 26-27 of the Holiday Mini Catalog. All of the sentiments are from the stamp set "Four the Holidays", found on page 19 of the Holiday Mini Catalog.
In each example I used the shimmer paint by itself. You can also layer it with other ink colors, but I chose to use it in it's pure form. For each one I applied the shimmer paint with a sponge piece. I cut my sponges into 8 piece wedges. Simply shake the shimmer paint bottle a few times, then use the paint inside the lid area.

The first card is Platinum on Basic Grey. The sentiment was embossed with white embossing powder. While the embossing was still warm, I coated it with real red pastel. This is refered to as the chalkboard technique. The small snowflake on the ribbon is from the stamp set "Serene Snowflakes", stamped in Platinum on Real Red and punched out with the Boho Blossom Punch.

The second card is Champagne Mist on Kraft. The focal snowflake is Champagne Mist on Whisper White. The sentiment is Bordering Blue Craft Ink (oops meant to use Brocade) and Clear Embossing Powder. The background is white craft ink on Brocade Blue. I added an Ice Circle Rhinestone to the center of the snowflake. The ribbon is Brocade Blue and Whisper White layered on each other.

The last one is Frost White on Sahara Sand. Believe me when I say that the cards glimmer much more in person.


All of these products can be purchased online at My Stampin' Up! Website 24/7.

As an added bonus to try the Shimmer Paints soon, contact me with an order for "Serene Snowflakes" and 3 bottles of Shimmer Paint by Sept. 30th and I will give you the Stampin' Sponges for FREE! (To get this special you need to contact me directly, the online ordering system will not recognize my personal product specials.)
.
.
.

Sunday, September 13, 2009

More My Digital Studio

I know, another layout. I can't stop myself. It is so easy. My Digital Studio has been my answer to getting it done. I used to take DAYS, even weeks or longer, figuring out what do to with a layout. I hated the thought of cutting paper. What if I messed up? What if I didn't like it? And if it was my last sheet of Designer Paper or a special photo, it made it all that harder. Now I can try it all out without wasting any supplies.

For my next layout I started with a blank page on the left and a photo template on the right. I wanted a more simplistic look to go with my photos today. I placed simple black mats behind the photos. The stamp from "Baroque Motifs" was stamped in black and then made opaque to 20%. It gives the look of stamping off (stamping first on scrap paper before stamping on your project). You can play with the levels and make all of them the same throughout your project. After adding the ribbon, I moved the placement of the motif. Yet another bonus of My Digital Studio. You can move, save, add, save again, and change it all over..........again and again.
Keep checking back for more projects......and I promiss to show some stamped cards too.

Saturday, September 12, 2009

My Digital Studio (photo templates)

When you start a project with My Digital Studio you have several options. The first option I already showed you (scrapbook page templates). These are pre-made scrapbook pages. You drag and drop your photos and you are done.
The second option is to use a photo template. Again you can drap and drop your photos into the premade templates, but you need to add your own embelishments and such also. Of my example today I used one of the photo templates, but also altered it to suit my project. The original template had 4 photos across the bottom. I put an embelishment in one of the spaces. I added my own background paper, selecting a Kraft Designer Prints Paper.

The top of the template had two equal spaces, one for journaling and one for a photo. I enlarged the photo area to highlight my main picture. I added a simple journaling tag from one of the Simply Scrappin' Kits within the program and used stamps in the large space originally meant for journaling. The stamps are from the Snow Burst stamp set. When you add stamps from the program you can change them into any of Stampin' Up! fabulous colors (including this years & last years In Colors).
My Digital Studio comes with many embelishments to choose from. I included some ribbon in both a straight form and a tied knot on this page. I also added a photo mat to the main photo and some photo corners with the photo corner punch. The mat and punches can be done in any SU! Cardstock color or Designer Series Paper (many included in the program).
REMINDER: My Digital Studio is available to customers on October 1st.


Thursday, September 10, 2009

My Digital Studio is.........

Crazy Easy!!!! This program is so fabulous. I may actually get some long overdue scrapbooking done. I just got program a couple of hours ago. I uploaded the two disks, checked my email real fast, read a couple strange articles about nothing serious on Yahoo and then made this 5 page scrapbook layout.
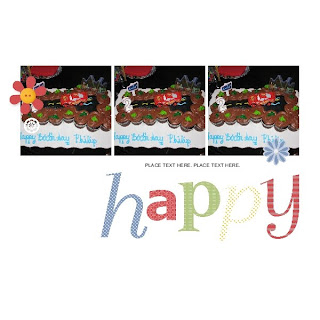
I used the pre-designed pages for the "Happy Bday" Simply Scrappin' Kit. I selected 7 of the pages to start with. Though I deleted two of the pages in the end, I did move elements from one of the pages to another. The first is the original page (I added the same photo on every page so you could see where the photos were planned to go). The second is what I did with it. Some of the pages I just dragged and dropped my photos directly from my computer. Other pages I moved some of the elements around and resized pictures.

For page 1-I deleted a couple of the flowers, moved the text box out of the pictures way, and changed out the element (happy bday -->Make a Wish)
I did the most to this page. Changing the orientation of the photo and letters.
Nothing here. Just drag and drop the photos and chance the text box.
Simple add of the photos. Moved a few of the flowers. The present box came from the pages I deleted.
I changed out the background paper, deleted a couple of the tiny flowers, used the punch feature to add the focus on the "2" and changed out the "2" for another one in the Simply Scrappin' Kit.
This program is available to customers starting October 1st. I am having a My Digital Studio 101 class on October 2nd. Come learn about the things MDS can do for you.

Monday, September 7, 2009

Clear Cards

Need an interesting twist to your next card. Try a clear card base. It gives a nice classy look to the simplest of images. When making your clear card be extra careful in folding your clear sheet in half. It is hard to fix a bad fold on a clear sheet.
I made mine with "Dasher". Isn't he cute? You can find him on the last page of the current Idea Book & Catalog. Using Versamark ink I embossed him in silver on Silver Cardstock. Then matted him on a piece of Whisper White. Inside the card there is a small panel of whisper white with my sentiment on it. Tied to the left side of the card is a piece of Organza Ribbon.

The next time you are not sure where to start, consider a clear base for your creation.

Sunday, September 6, 2009

Decor Elements

About a year ago Stampin' Up! expanded into Decor Elements. These are vinyl art for your walls. Actually they can go on more than just your walls. They can also go on glass or other home decorative items like candles, lampshades, or mirrors. This is only a small number of items you can use decor elements on.

I purchased the Ginormous Flowers MONTHS ago for my daughters bedroom wall. I am sad to say that I waited a long time to put them up out of fear it would be too hard. Boy was I stupid. These are SOOOOOO easy to do. You rub one side of the element to transfer it to the paper. Peel off the backing paper. Place it on your wall. Then rub the other side of the paper to transfer it too your wall. I put all these flowers up in less than two hours, even while fighting my two boys from being in my way and playing with the flowers. You can't even see all of them in the photo. (I was trying not to show too much of my daughters messy room.


The decor elements are designed to go on flat surfaces. My walls, however, are textured in a stucco style. The elements went up easily. As I added each layer, they got easier to apply. I did have to push some areas down with my finger to get the edges into the crevises on the wall.


If you have not yet checked out the Definitely Decorative catalog, you can download it here. The catalog also has a selection of stencils in our exclusive SU! designs. You can order the Decor Elements, Stencils or any other SU! product online 24/7 at My Stampin' Up! Website. As always feel free to contact me with any questions you have about SU! products or my SU! events.

Thursday, September 3, 2009

IT'S SEPTEMBER

I know it has actually been September for a few days, but the first few days were busy in our home. Trips to the emergency room, grocery store trips for hours, and a wonderful Stampin' Up! workshop last night.

So enough about my busy life and more about new products. September means HOLIDAY MINI CATALOG. If you are a past customer of mine you have hopefully received your in the mail by now. If not click HERE and download a copy till your personal copy gets to your house.
99% of the products in the mini catalog is available for purchase from Now until January 4, 2010. You can order products from and SU! catalog 24/7 at My Stampin' Up! Website (click "shop now" in the upper right corner). The only product not available for purchase at this time is.......................
My Digital Studio!! MDS will be available for purchase starting October 1st. Demonstrators like myself are currently getting our copies now, so we can learn all the ins and outs in time to show you how fabulous this program is. It comes with almost $400 worth of downloadable digital contents. You can use brads, stamps, cardstock, designer series paper, punches, ribbons and tons of other products from the Stampin' Up! line to create your own cards, scrapbooks, calendars and unique projects. I will tell you more about MDS once I have my personal copy to play with soon.

PROMOTION FOR HOLIDAY MINI CATALOG
Sweet Rewards Hostess Special: From now till Nov. 30th, host a workshop of $250 (before tax & shipping) and select any one item out of the Holiday Mini Catalog for only $10.00. (excludes Hostess Sets and My Digital Studio--see below). Select from stamps, dies for the Big Shot, Simply Adorned Jewlery and other wonderful SU! Products.

From October 1st thru November 30th, hostess a workshop of $400 (before tax & shipping) and get My Digital Studio for 50% off. Retail price $79.95, Sale price only $39.97

CARD KIT OF THE MONTH- September 2009

Featured Set: “Falling Leaves” and Featured Accessory: Orchard Ribbon Originals

In this kit, you'll receive the supplies to create SIX of EACH design shown above - so you will receive all of the consumable supplies that you need to create 12 cards total.

You will also receive 2 additional full color samples of "alternative" cards that you can make with the combined contents of the kit, as well as step by step instructions on how to complete each of the 4 designs.

Card Kit Price is just $15--that's 12 cards, plus envelopes for just $15!

Each month, the card kit also features both a Stamp Set of the Month and an Accessory of the Month. If you purchase the card kit, you may also purchase these items at 15% off!

September Featured Products:
§ Falling Leaves Stamp Set ($21.95) $18.66 with the purchase of the Card Kit
§ Orchard Ribbon Originals ($9.95) $8.46 with the purchase of the Card Kit

What else will you need? See the list below for items that were used to create the cards in this kit. If you already have everything--just buy the card kit and you are ready to create!

If you don't have everything--place a product order with your kit (don't forget about the discount on the "featured products!")

Or--you can use the card kit to create your own designs using other stamps and inks that you already have--the choice is yours!

Orders for the Card Kits must be received by September 10th. You will receive your kits by the end of the month.

You can email me to order your card kit:
Kathleen Brill-Myrice
Fa_stamper@sbcglobal.net

Please Note: I am glad to ship kits directly to you! If the kit needs to be shipped, there will be an extra $3 shipping charge.

All Stampin' Up! products can be ordered by emailing me or online 24/7 at My Stampin' Up!Website. (To get the discount on the featured product you will need to contact me directly.

Products you will need to complete cards as shown:

Always Arichoke Classic Ink Pad ($5.95)
Soft Suede Classic Ink Pad ($5.95)
Bravo Burgundy Classic Ink Pad ($5.95)
More Mustard Classic Ink Pad ($5.95)
Elegant Eggplant Classic Ink Pad ($5.95)
VersaMark Ink Refill ($3.95)
Stampin’ Around Jumbo Handle ($5.95)
Uninked Jumbo Cartidge ($7.50)
1 ¾” Circle Punch ($15.95)
1 3/8” Circle Punch ($15.95)
1 ¼” Circle Punch ($15.95)
1” Circle Punch ($10.95)
Stampin’ Dimensionals ($3.95)
SNAIL Adhesive ($6.95)
Bone Folder ($6.95)
Paper Snips ($9.95)
Mat Pack ($9.95)
Paper Piercer ($3.50)
Bright Blessings Jumbo Wheel ($8.50)
Falling Leaves Stamp Set ($21.95) $18.66 with the purchase of the Card Kit
Orchard Ribbon Originals ($9.95) $8.46 with the purchase of the Card Kit